Anchor Setup
The previous pages get you the right idea about rules of Anchor Vista Omni and Anchor Vista DirectFive deployment. Now, let's have a look at how to setup an anchor.
The correct setup, powering and deployment of the anchors is crucial for any project.
Power Supply
Anchor Vista Omni → see page Power Supply Option - Anchor Omni in section Anchor Overview.
Anchor Vista DirectFive → see page Power Supply Option - Anchor DirectFive in section Anchor Overview.
Anchor 1.4 → see page Power Supply Option - Anchor 1.4 in section Anchor Overview.
Anchor Preparation
The anchor preparation process is a bit different depending on the type of the anchor hardware that you have. Sewio can provide you two types of Anchors → Ethernet or Wi-Fi.
Recommended network architecture is an Ethernet-based network and the network should be dedicated to RTLS if possible.
Ethernet Backhaul Deployment
The Ethernet type of anchors have the same IP address of 192.168.225.200 in default. You should change the address of all anchors that will share the network one by one to a different address.
To change the address, go to RTLS Manager -> Anchors Setting and change the IP address there.
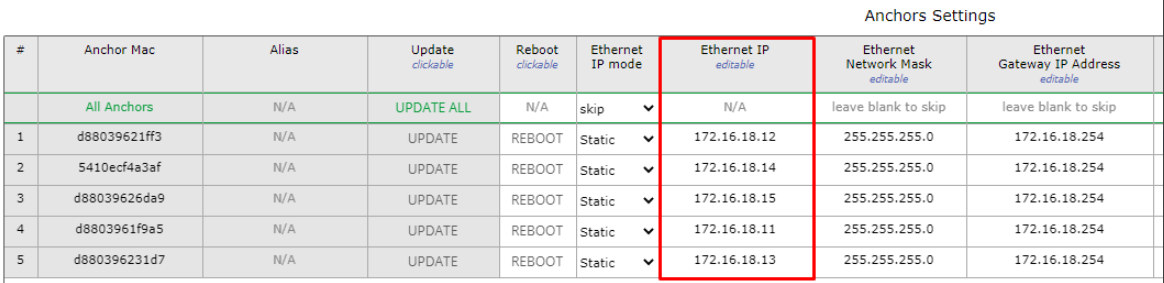
After changing the IP addresses, make sure that you have IP connectivity with all the anchors.
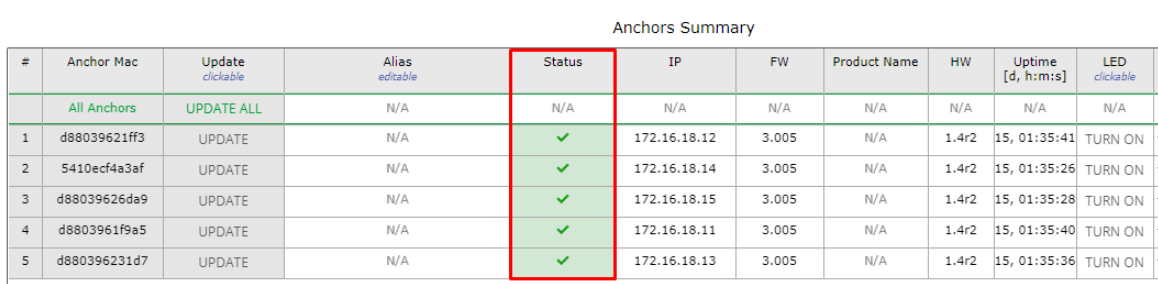
Go to RTLS Manager -> Anchors Summary and make sure that all of them are online with the different address.
Wi-Fi Backhaul Deployment
The Wi-Fi type of anchors are set up as DHCP client in default. The device is therefore waiting to connect to an access point (AP) via Wi-Fi. The AP must have DHCP server setting enabled.
1) Plug the anchors into power and check that they are online.
2) When the Wi-Fi anchor is waiting for he Wi-Fi connection the LED is flickering blue as showed below.

3) LED stops flickering if Wi-Fi connection is established and the anchor is connected to the AP → The anchor will receive IP address from DHCP server.
4) When these steps are finished, the anchors should be prepared for the installation.
On this page: