Anchor Vista Omni Deployment Rules
Please follow this section closely to ensure best positioning performance possible. Below are listed several points that should always be kept during the deployment process.
Installation of Anchor Vista Omni
Anchor Vista Omni has got omnidirectional antenna. Therefore, it must be installed with the antenna straight up or in some cases down.
On the picture below you can see the ideal radiation pattern of the omnidirectional antenna. To achieve the best performance it is important to install anchor correctly and not bend the antenna.

Minimum number of anchors for position calculation is four.
This number of anchors will allow you to create a location cell of the correct shape and get an accurate location.
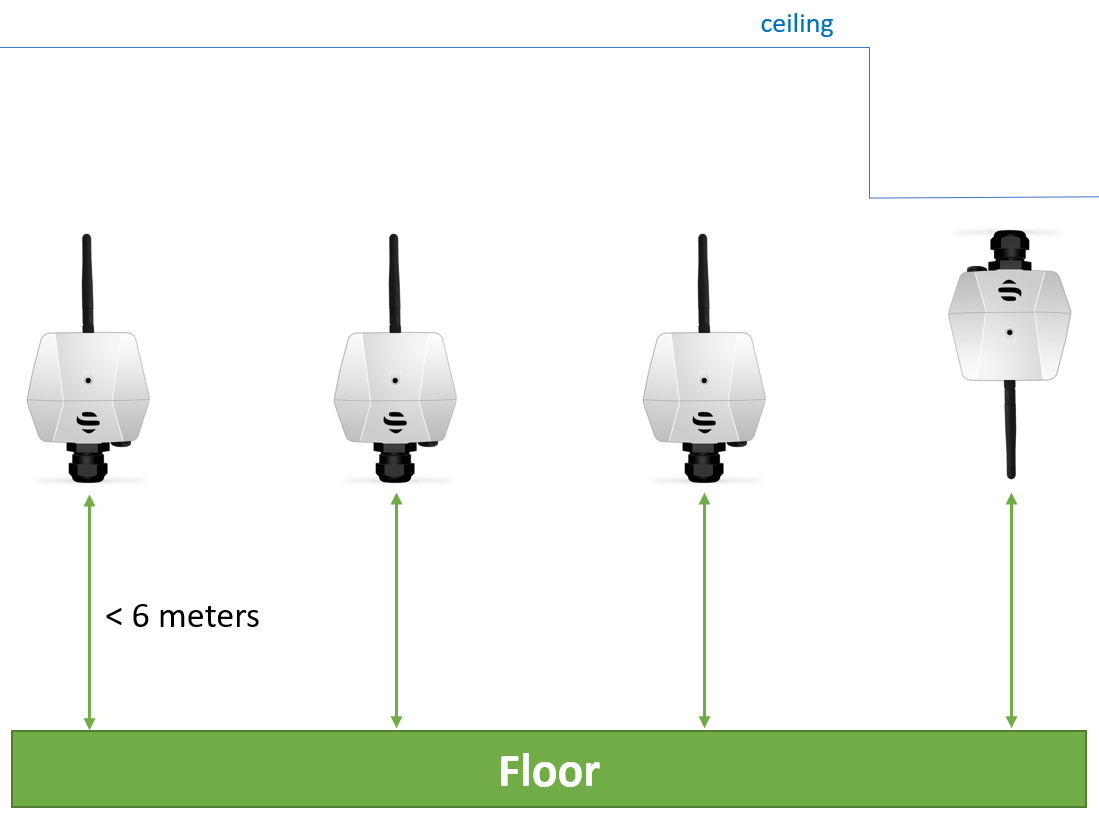
Mount the anchors ideally at the same height in each location cell.
The best approach is to mount the anchors at the same height within the location cell. If given venue does not allow it, try to keep them at least roughly within the same level, max. 100 cm difference. The absolute height should not exceed 6 meters above Tags, applies for Anchor Vista Omni.
Keep anchors separated from walls or ceiling.
Always mount the anchors on holders provided with them. Never place the anchors right on the wall or ceiling as it may affect the anchor’s antenna radiation pattern and decrease its radio performance. If the anchor is close to a ceiling as shown on the picture above, install the anchor with antenna pointing vertically down.
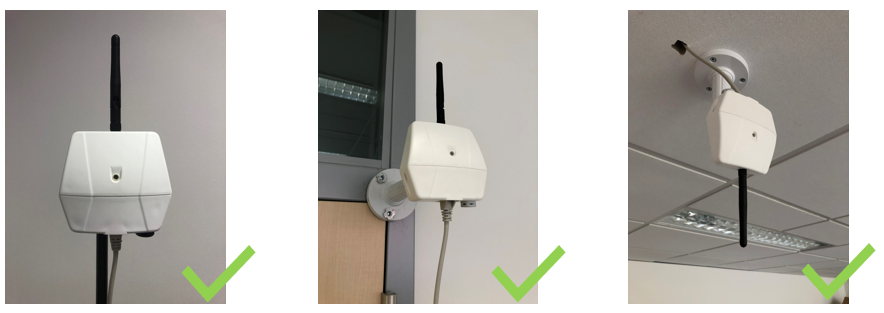
Correct installation examples
Below, you can see correct Anchor Vista Omni installation positions. The anchor should be installed with antenna pointed vertically up. In case of ceiling installation where the antenna could be very close to the ceiling, the anchor shall be installed with the antenna pointing vertically down.
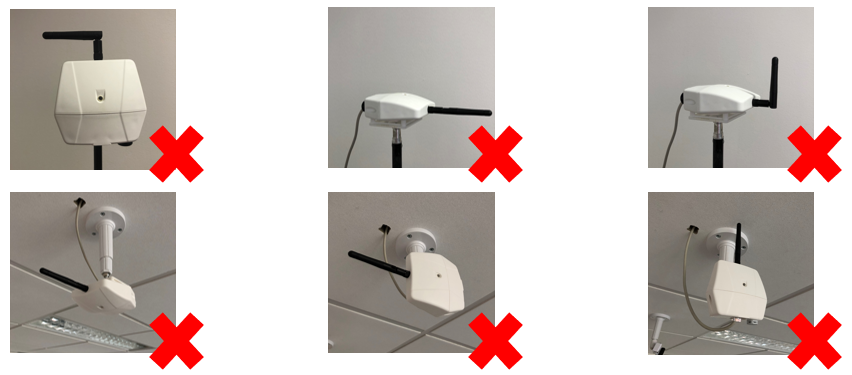
Wrong installation examples
The examples of wrong Anchor Vista Omni installation positions are demonstrated on the pictures below. Do not install the anchor in horizontal orientation and do not in any case bend the antenna. If the antenna is bent its radiation pattern is degraded and the anchor's performance is significantly reduced.
Mounting Brackets
Anchor Vista Omni is delivered with mounting brackets Mikrotik quickMOUNT PRO LHG. You can also buy the Anchor Vista Omni (w/o Accessories) which is delivered only with Wall Mount Bracket.
More details about mounting bracket and assembly guides you can find on page Device Mounting - Vista Omni.
Deployment of Anchor Vista Omni
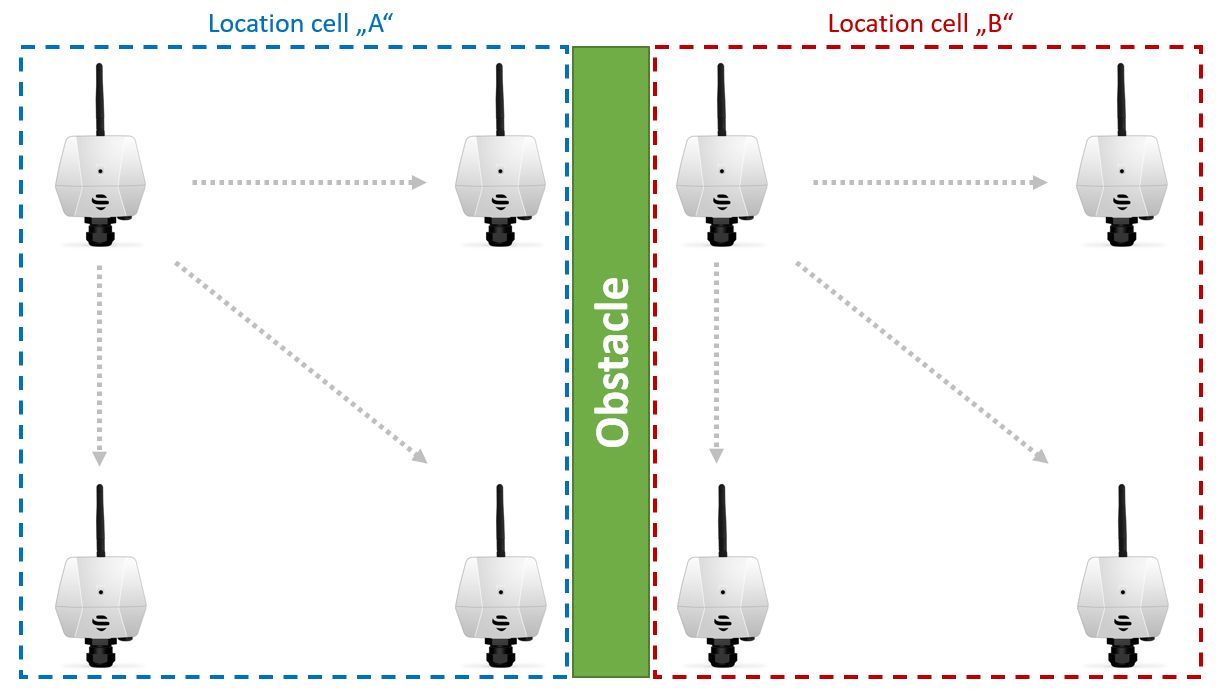
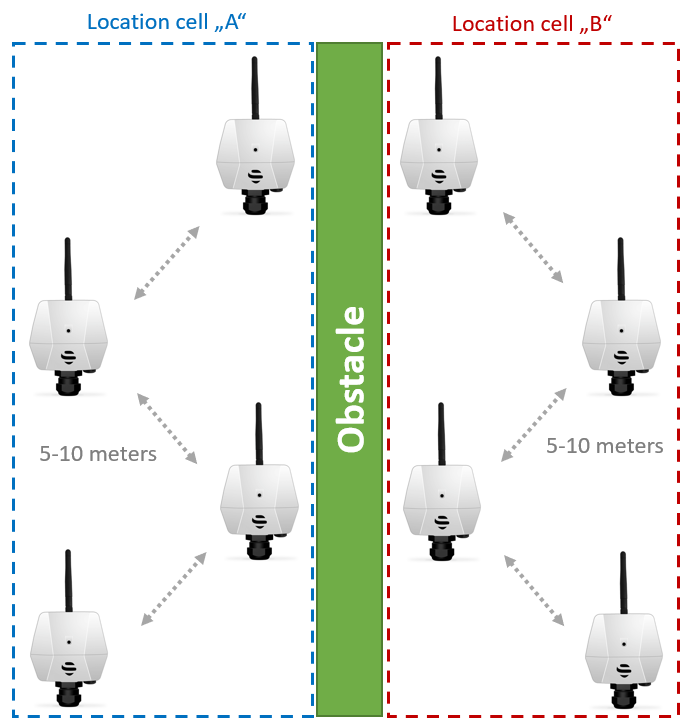
Always keep a clear line of sight between the master anchor and neighbor anchors within location cell.
The master anchor should always have a clear line of sight to at least three other anchors in its vicinity. It is not required to ensure line of sight between all anchors in the system just in the same location cell. Each location cell must have its own master. Master selection is done via RTLS Manager.
Deploy the anchors above the objects that are being located.
The anchors use a wireless synchronization, this means that they need a clear line of sight between each other. Therefore, it is best to mount them above any moving objects including the objects that are being localized.
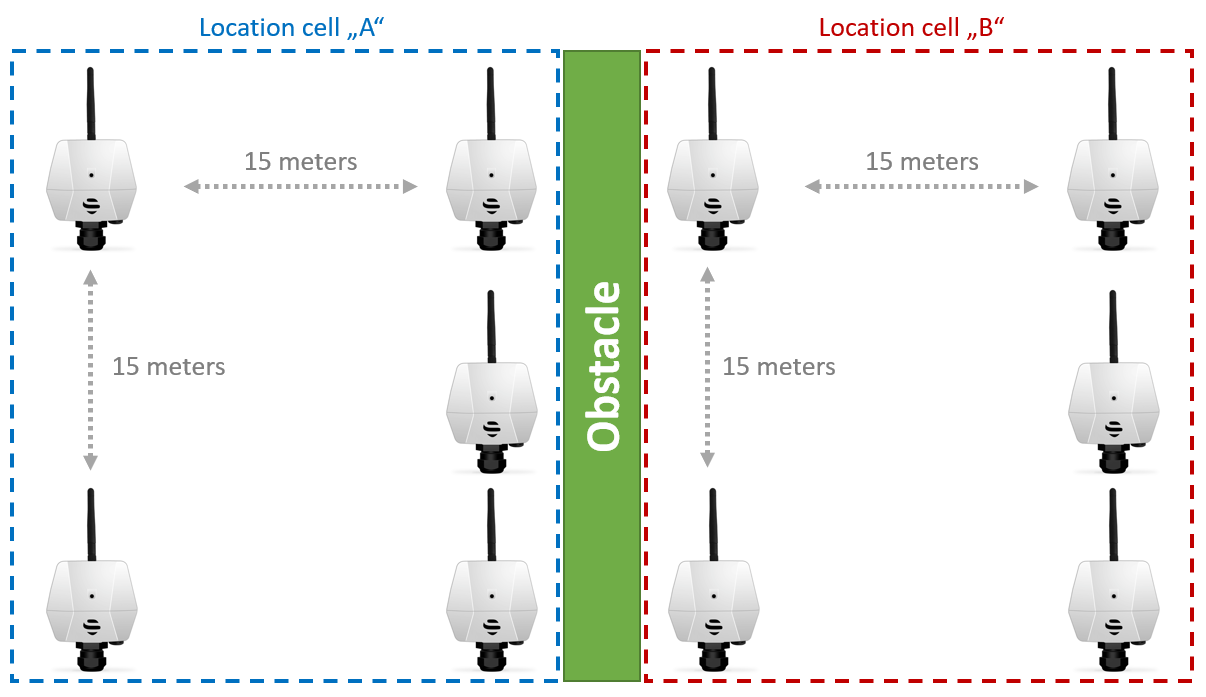
Keep a square geometry during the deployment.
Due to dilution of precision phenomena, the best approach is "squaring" the location cell. The ratio between the two sides should not be higher than 3:1 to achieve highest possible accuracy.
Try to maintain a direct line of sight between the tag and the anchors → if the tag deployment is not ideal then higher density of anchor placement is needed.
- Find the highest point with minimum metal shielding for asset deployment.
- Find a spot with minimum body mass for Tag placement on a person.
Practical Examples
This section introduces practical deployment examples from real installations in various environments. If you are not sure how to mount the anchors in your specific environment, use this section for inspiration.
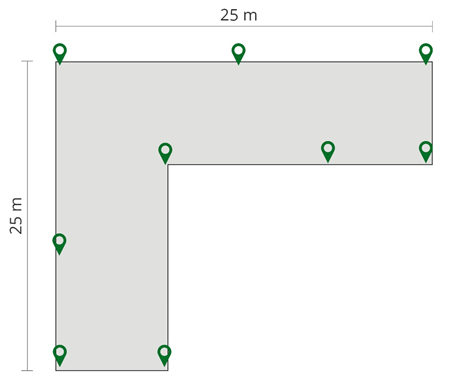
L shaped environment
To reduce the number of necessary anchors for this kind of environment, you can use zig-zag deployment.
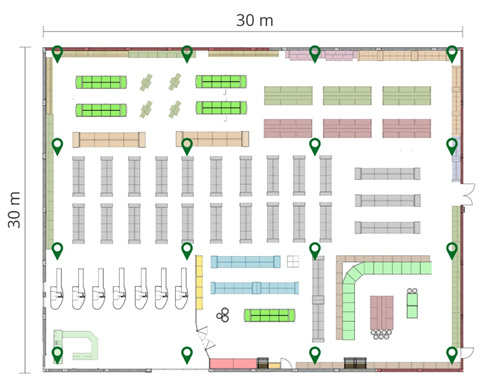
Retail store
When there are no major obstacles between the anchors, you can easily use the classic grid deployment.
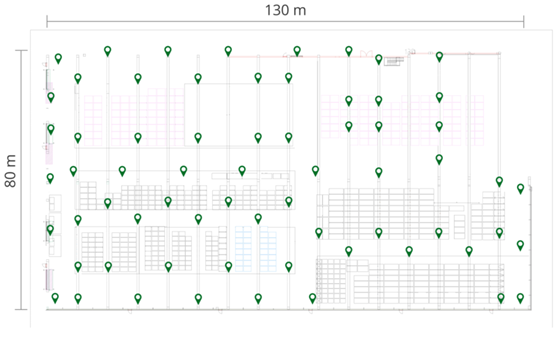
Warehouses and industry
In these environments, there are usually lots of obstacles between the anchors. In open areas, you can use square deployment or, in the corridors, you can use zig-zag deployment to reduce the number of necessary anchors.
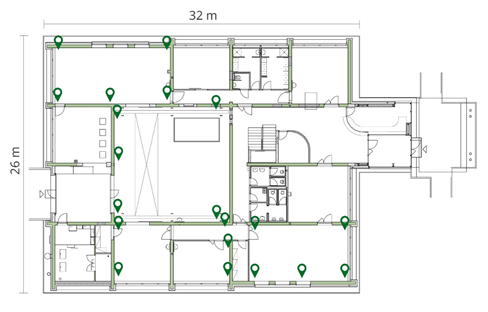
Office space
In these dense environments, you should put five anchors per each room and move the anchors as close to the wall as possible. If the walls are made of thin materials, like drywall (gypsum board wall), the signal can propagate well through these materials and you can use five anchors to cover more than one room.
On this page: