myRTLS On-Premise
MyRTLS Cloud deployment consists of three steps:
- You have to set your site on myRTLS Cloud for On-Premise deployment first.
- As the second step, you download and install the myRTLS On-prem on a server in your private network.
- The last step is to install Device Care Data Probe and you can start collecting the data.
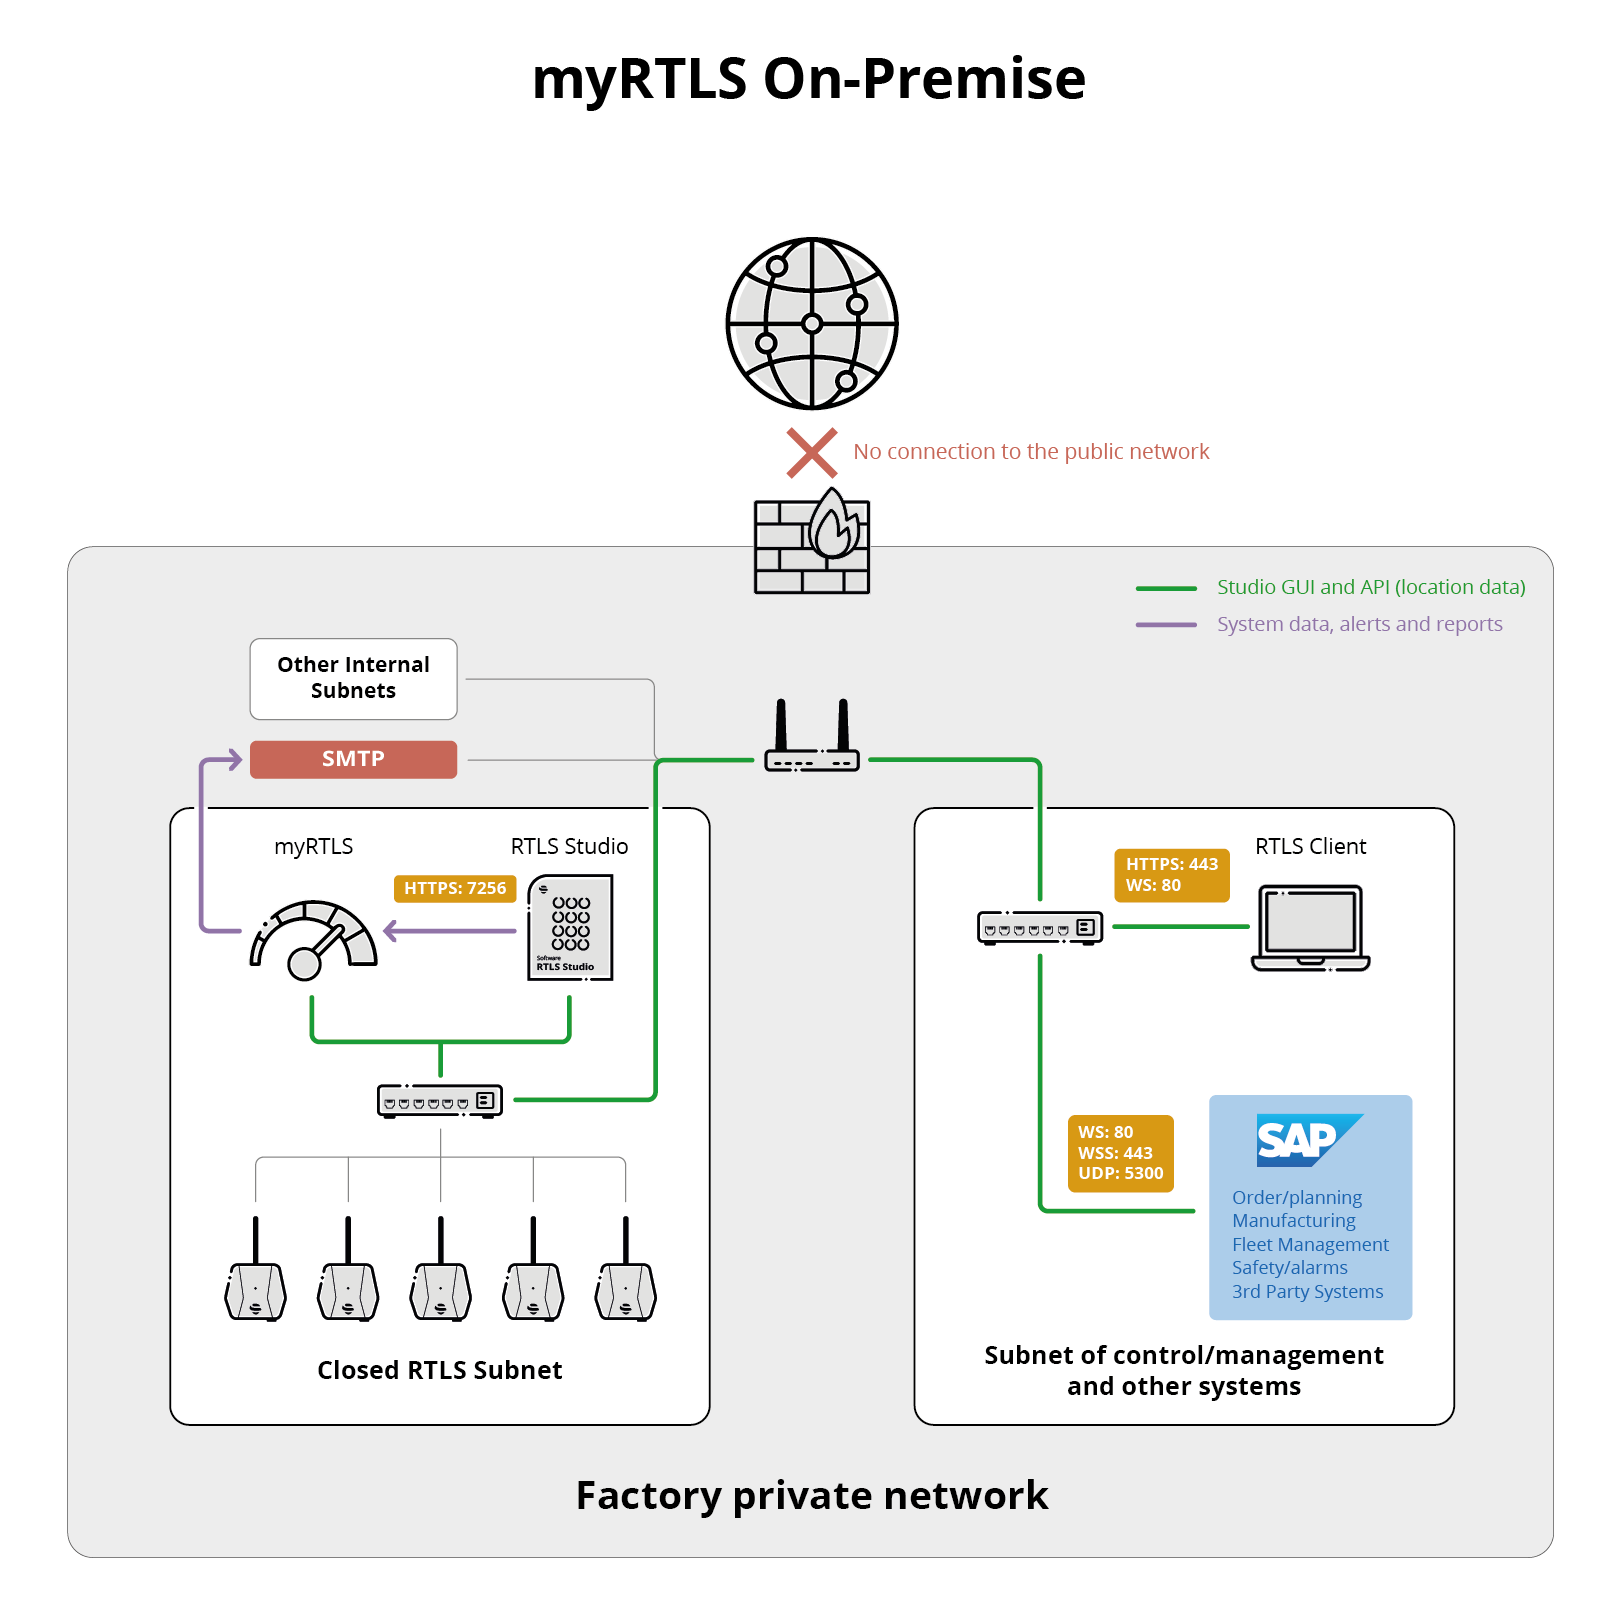
RTLS Studio Communication
The data collected by Device Cara Data Probe from RTLS Server are just simple logs including system data. It is a one-way communication that goes from the data probe to myRTLS via ports 7253, 7256 and 7259 (defaults). There is no other communication back to RTLS server from myRTLS.
RTLS Client Communication
When accessing On-Premise myRTLS the RTLS Client must have access to ports 7253, 7256, 7257 and 7260 (defaults).
myRTLS On-Premise Deployment and Installation Bundle
You have got access to myRTLS Cloud and you are logged in.
After the site first access, you will be redirected to section deployment. Where you choose a type of deployment you are going to proceed.
For the myRTLS On-Premise deployment and data collection follow the steps below:
- Select what deployment of myRTLS you would like to have → On-Premise.

- Confirm the selection by the Select button.
- Now, you can generate your installation bundle by clicking to Generate New Bundle.
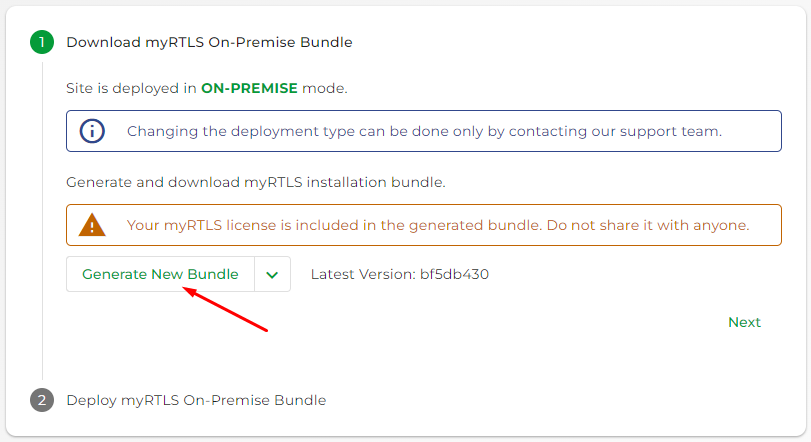
- Generating the bundle will take a few minutes. You will receive an email with a notification that your bundle is ready.

- When the bundle is ready, you can download it.
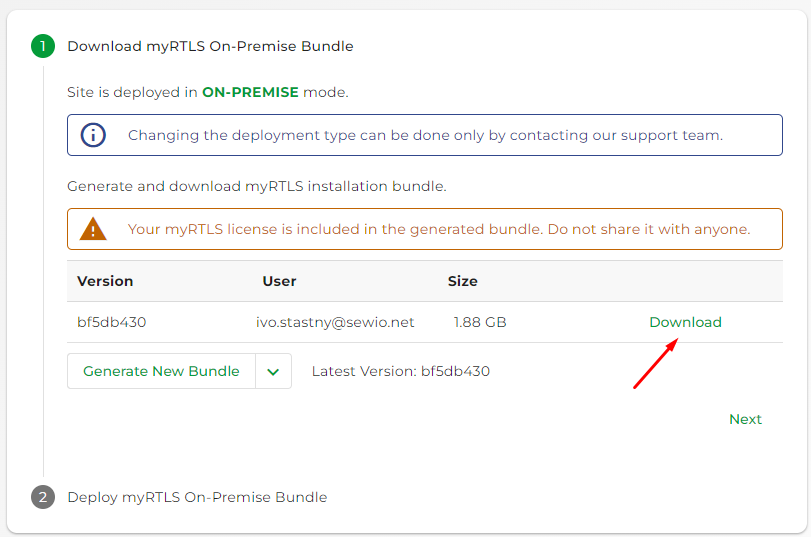
- The next step is to install myRTLS on a server in your local network. See more on the page below.
myRTLS Installation
Now, you have the installation bundle downloaded from myRTLS.com and you can proceed with myRTLS On-Premise installation.
Installation on Separate Device
The installation of myRTLS On-Prem should be done on a separate HW other than the RTLS Studio is installed on. That will assure that any RTLS Studio outage will be reported correctly. If you deploy myRTLS on the same device as RTLS Studio is running, you will lose both services during a possible outage.
The installation steps below assume you are going to install myRTLS On-prem on Ubuntu 20.04.
- Connect to the server with WinSCP.
Copy the install bundle to the directory on the server:
In our example, it is /home/ubuntu/home/ubuntu
You should be able to see the file in the directory after.
Create a new directory:
sudo mkdir -p /opt/sewio/myrtls
Extract the package:
Make sure that you use the correct name of the package → in our example below the file name is "myrtls-installer-10003.tar" (1003 = site number).
The exact command you can find on your site myRTLS.com:
sudo tar -xf myrtls-installer-10003.tar -C /opt/sewio/myrtls/ --overwrite
Navigate to the extracted directory:
cd /opt/sewio/myrtls
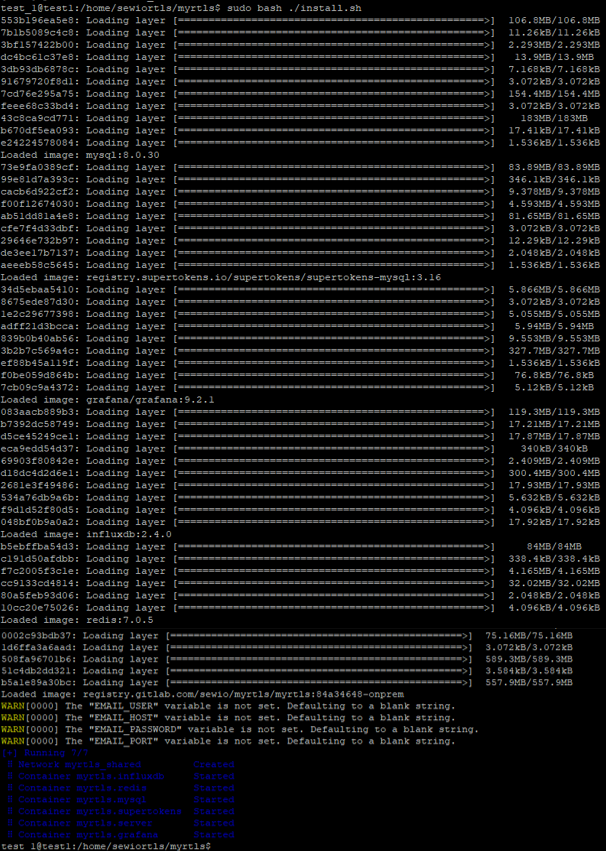
Run the installation script from the installation directory:
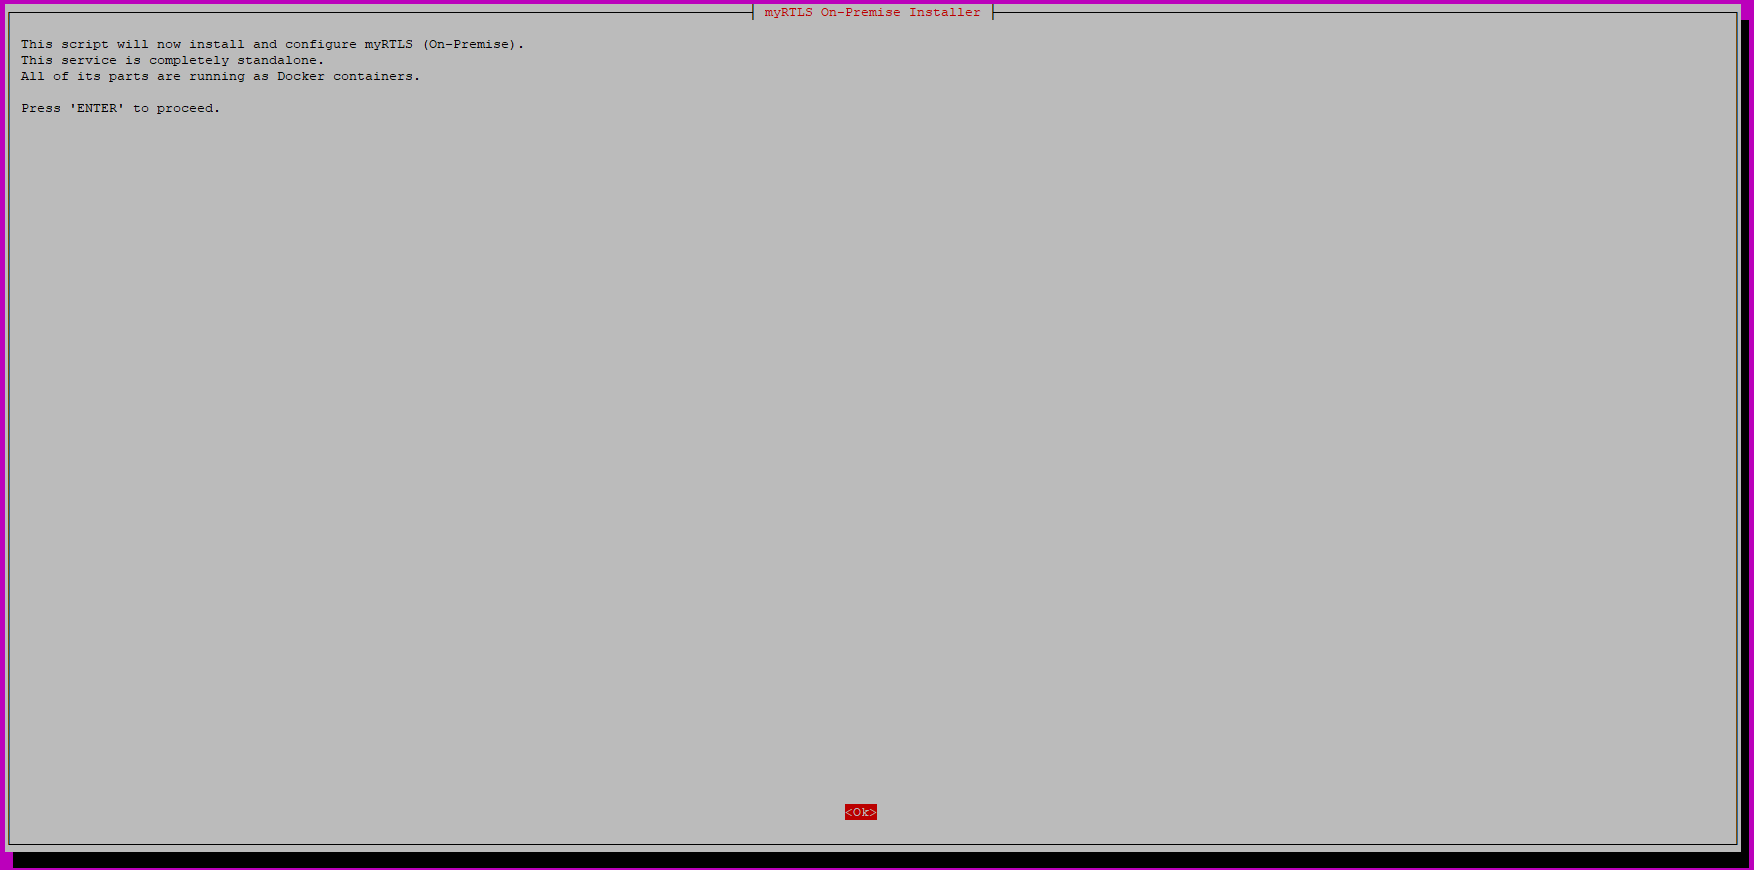
sudo bash ./install.sh
- Follow the instructions of the installation script by pressing Enter:
- Docker is installed:

- Create an account by adding myRTLS admin email:

- Proceed by pressing Enter.
Add the password for your newly created account.
- The password must be at least 8 characters long. If you add a shorter password the installation guide will terminate.
- Avoid using special characters (e.g. ? ; * ; / ; ! ; >)

- Proceed by pressing Enter.
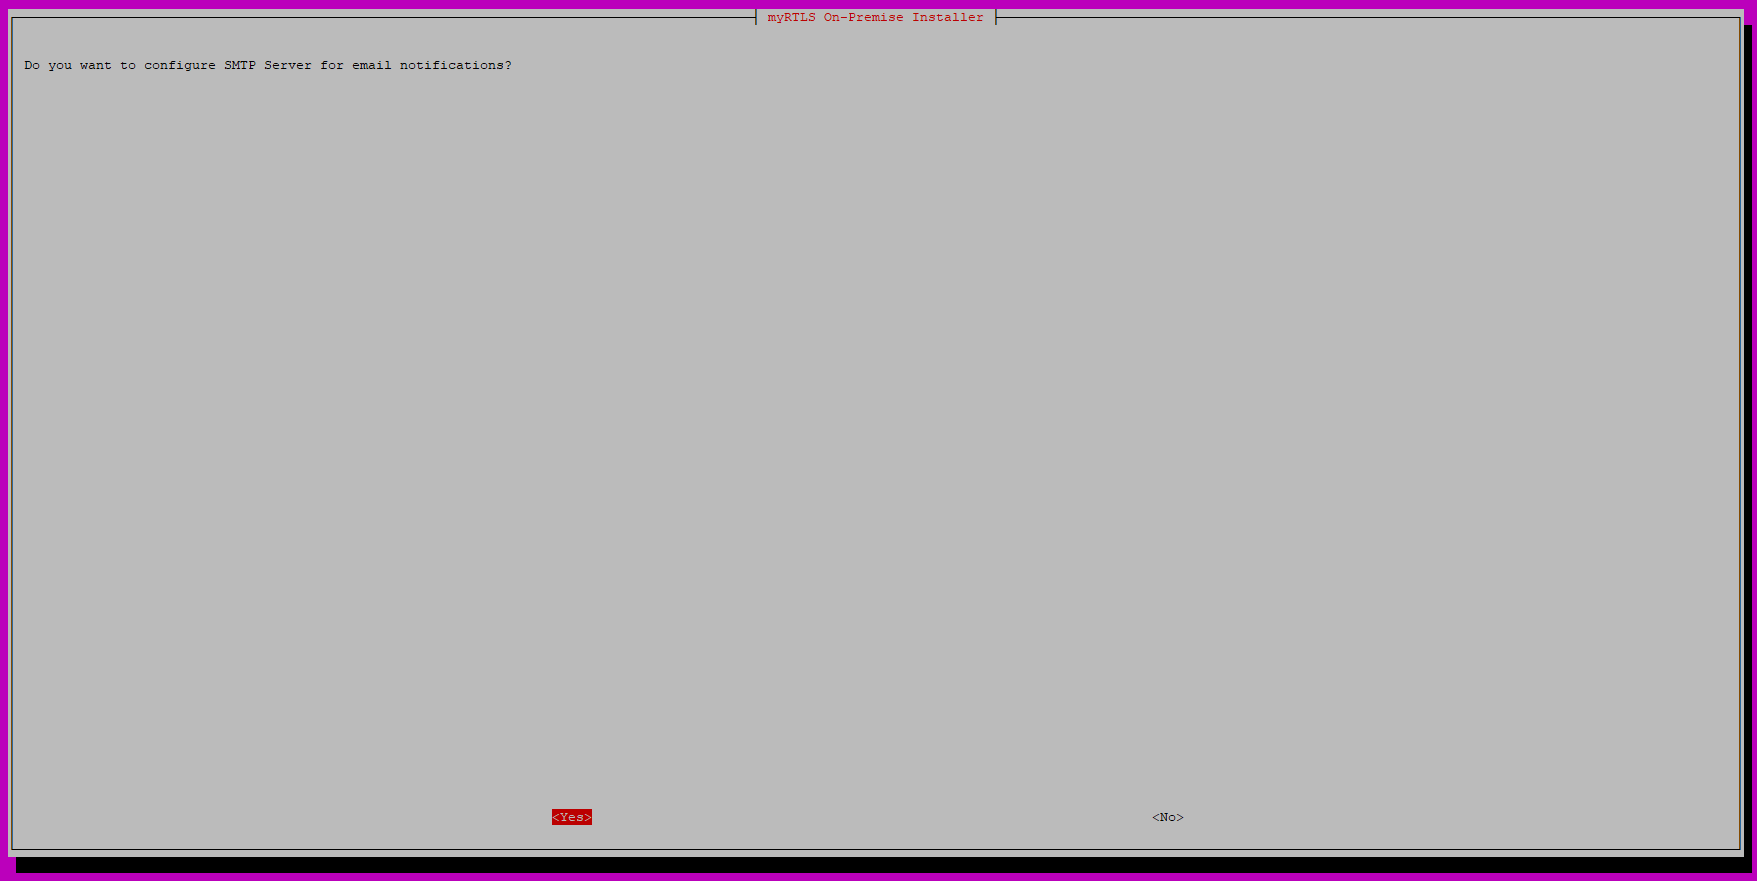
- Now, you can configure the connection from myRTLS to the local SMTP server if needed. There are two ways how to proceed:
- Follow OK when you would like to configure SMTP and follow step 13)
- Follow NO when you do not want to configure SMTP and follow step 21)
- Add SMTP hostname. In our example, the SMTP is located on IP address 192.168.225.25:
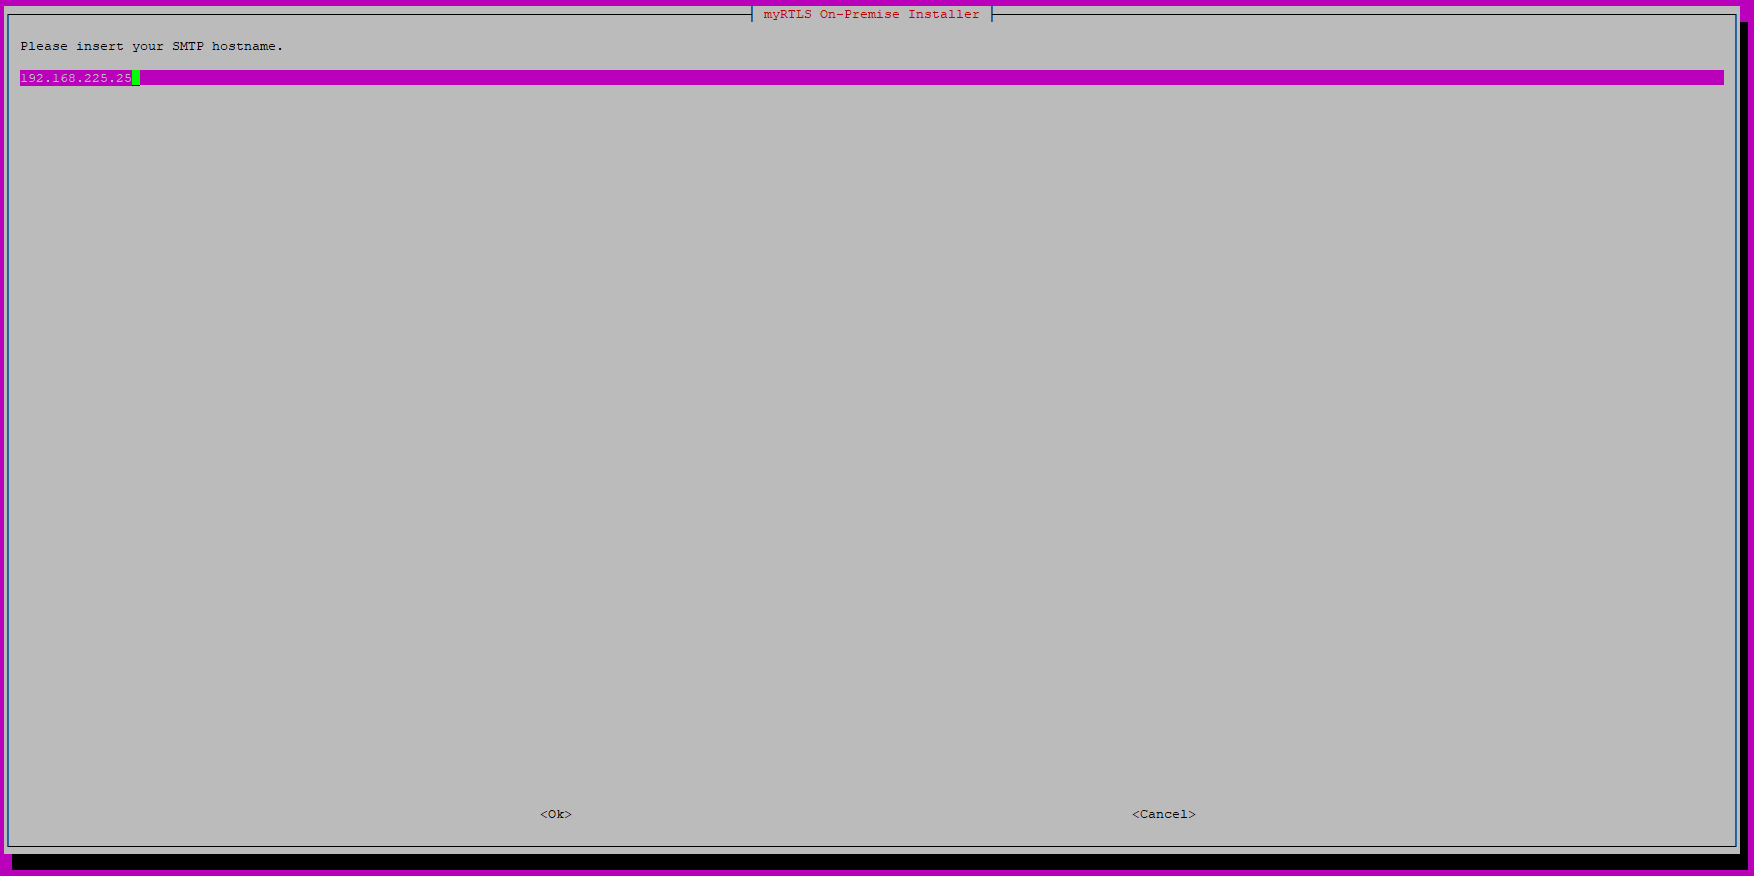
- Proceed by pressing Enter.
- Add SMTP port. In our example, the SMTP port is 2525:
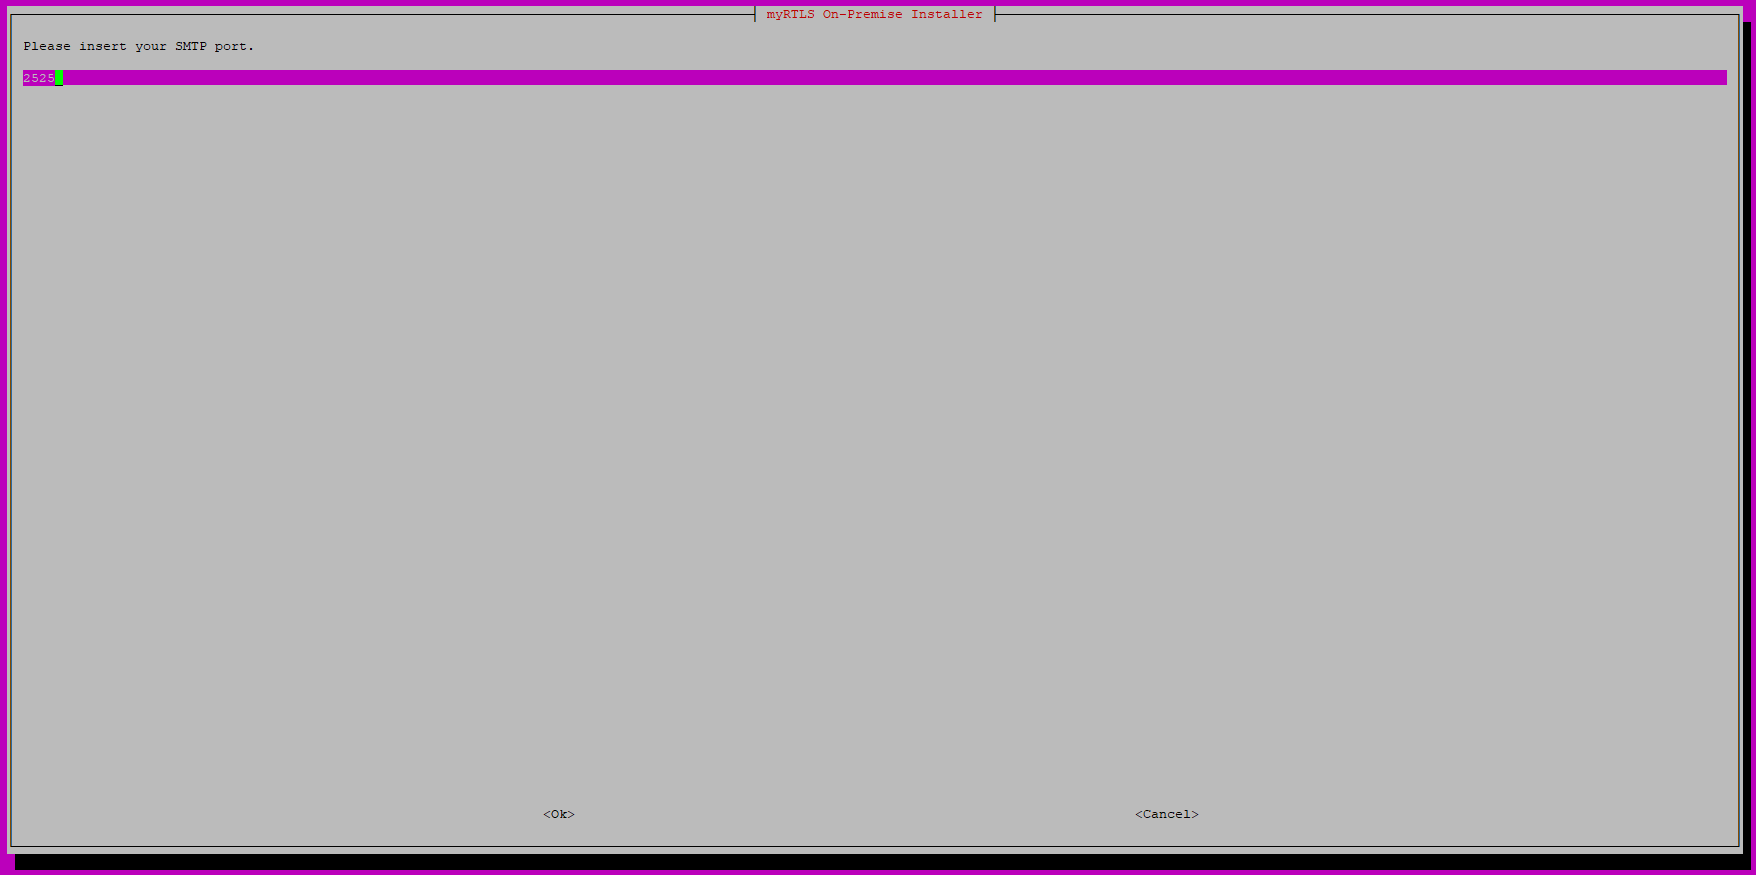
- Proceed by pressing Enter.
- Add SMTP user name based on your local SMTP configuration. In our example, the SMTP user name is myrtls@sewio.net
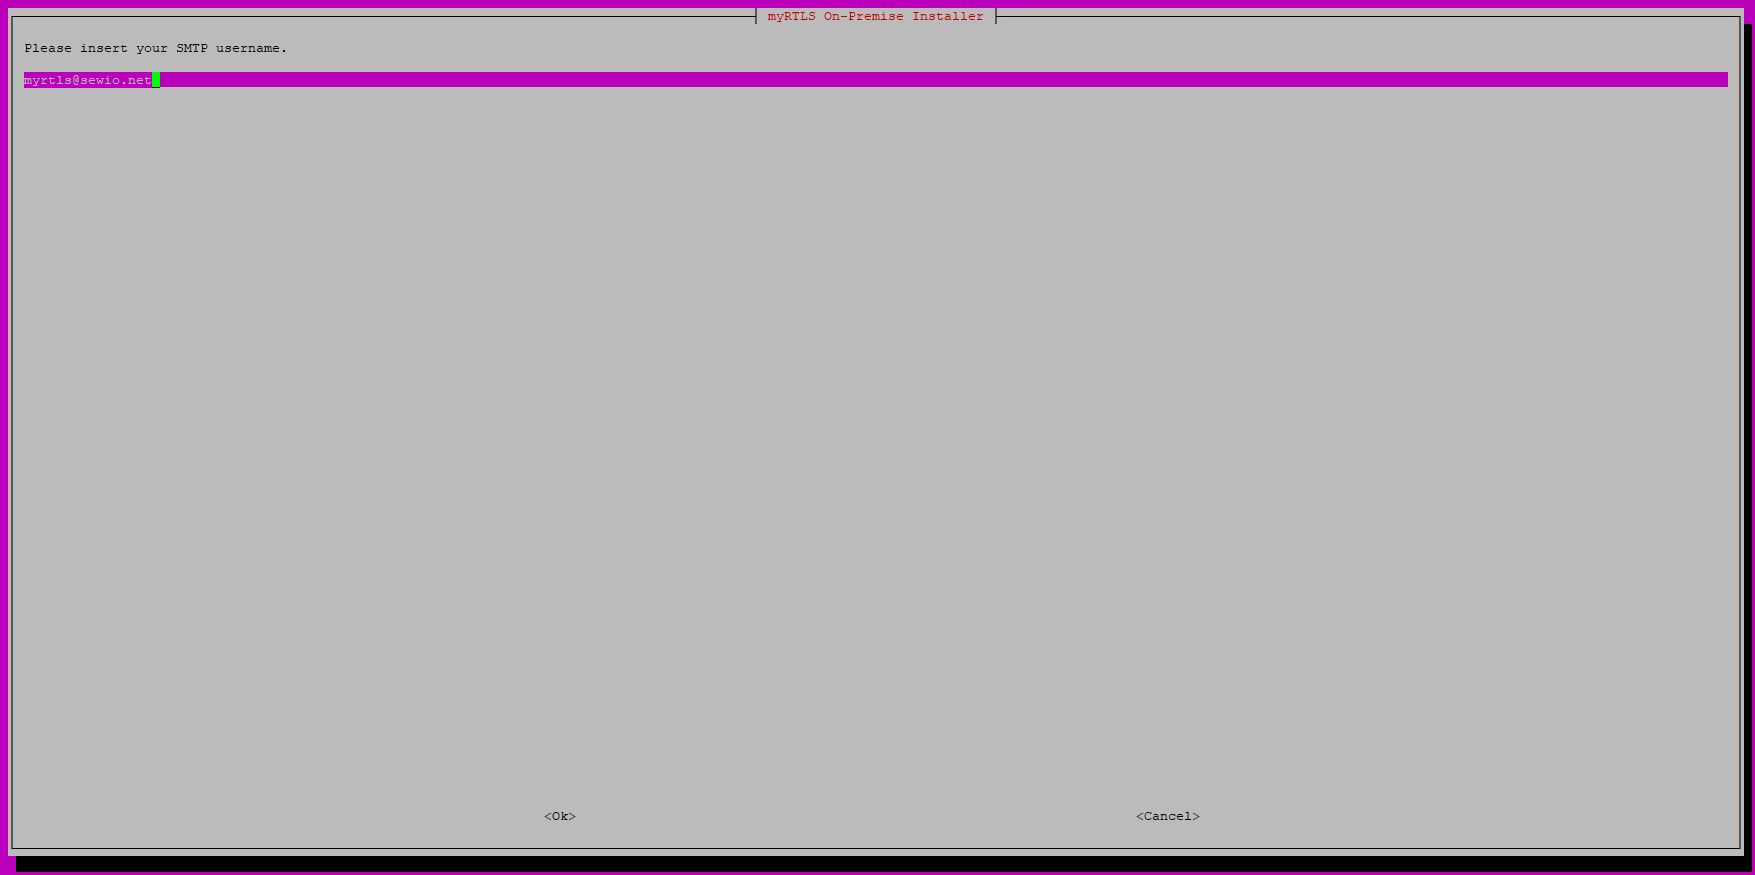
- Proceed by pressing Enter.
- Add the password for your SMTP user:
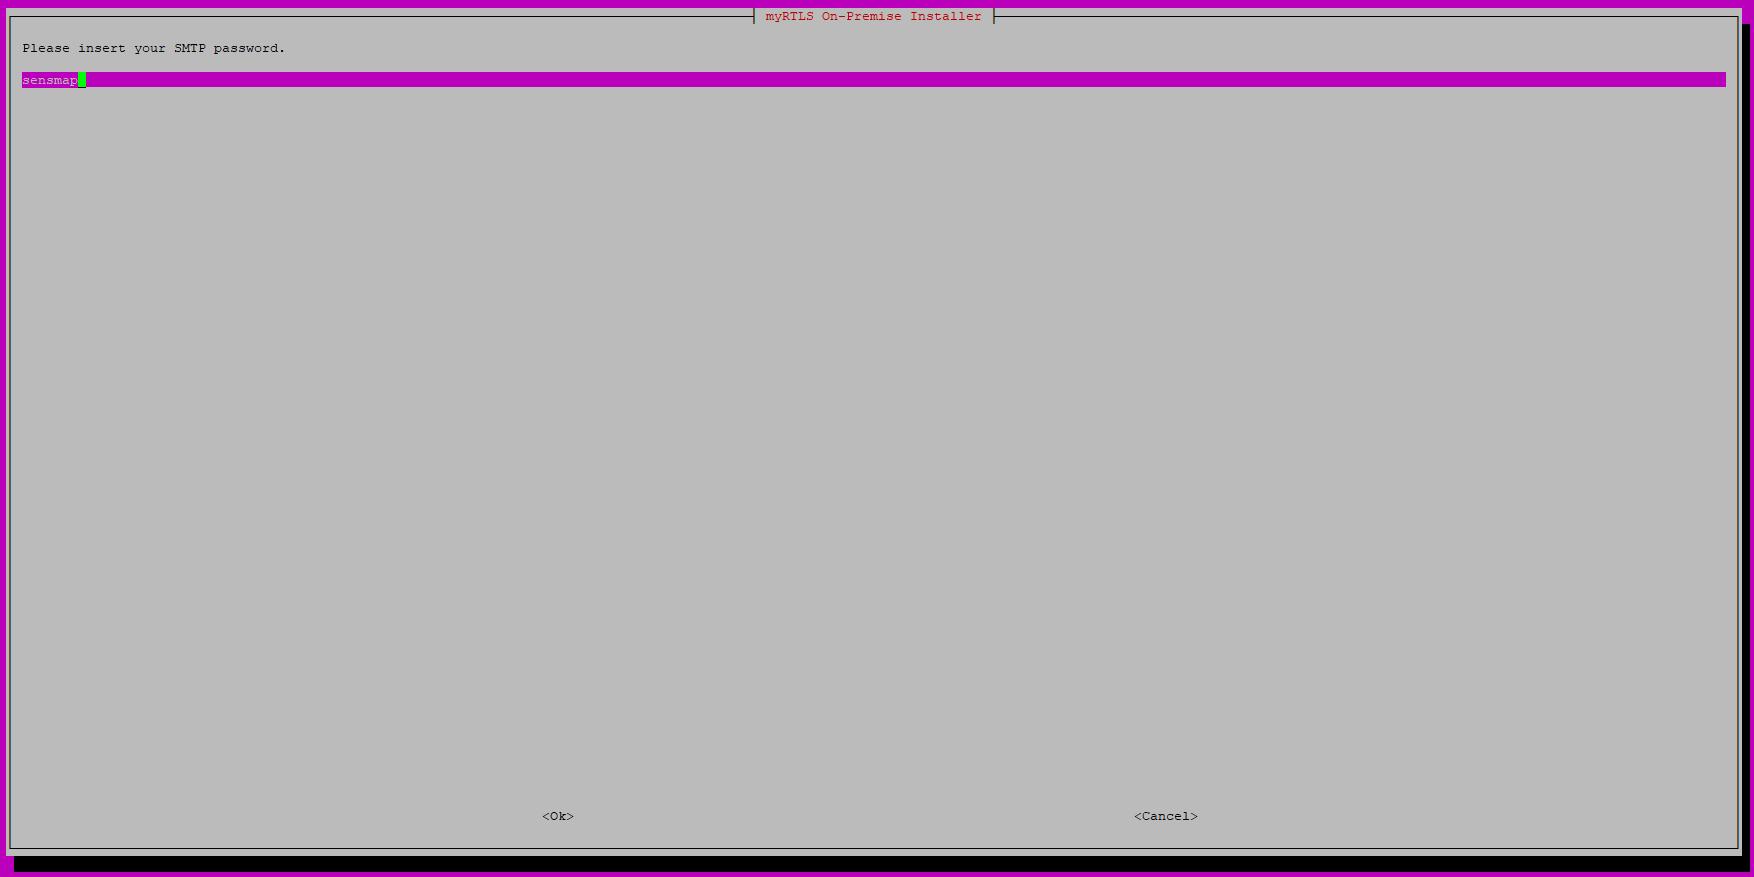
- Proceed by pressing Enter.
The installation guide shows you all the required ports for myRTLS communication. Continue by pressing Enter:

If you choose NO, you can set all your ports manually as needed for your network.
- As the last step, you need to add the URL of your myRTLS instance → default URL is http://192.168.225.2:7253 or add a custom including the IP address and port:
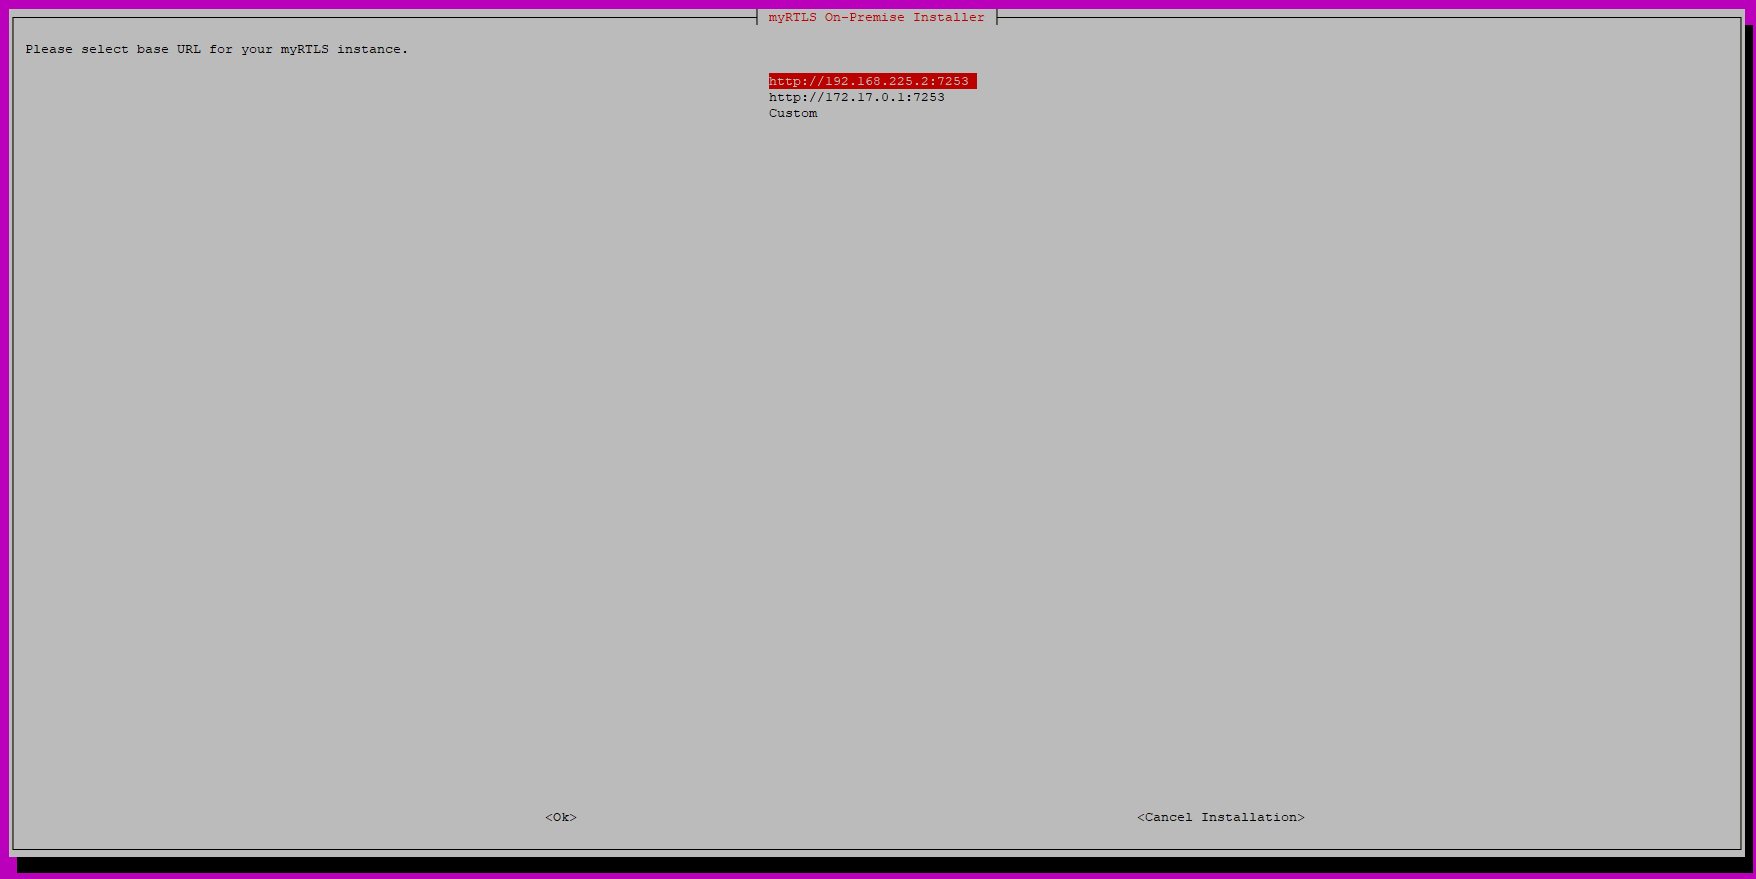
- Installation proceeds:
Installation is done. Finish the installation script by pressing Enter.
myRTLS instance is starting. It may take several minutes when it is reachable.

- Access myRTLS On-Premise GUI by the URL you added in step 22.
In our example http://192.168.225.2:7253
- Login with the credentials you added in steps 8 and 10.
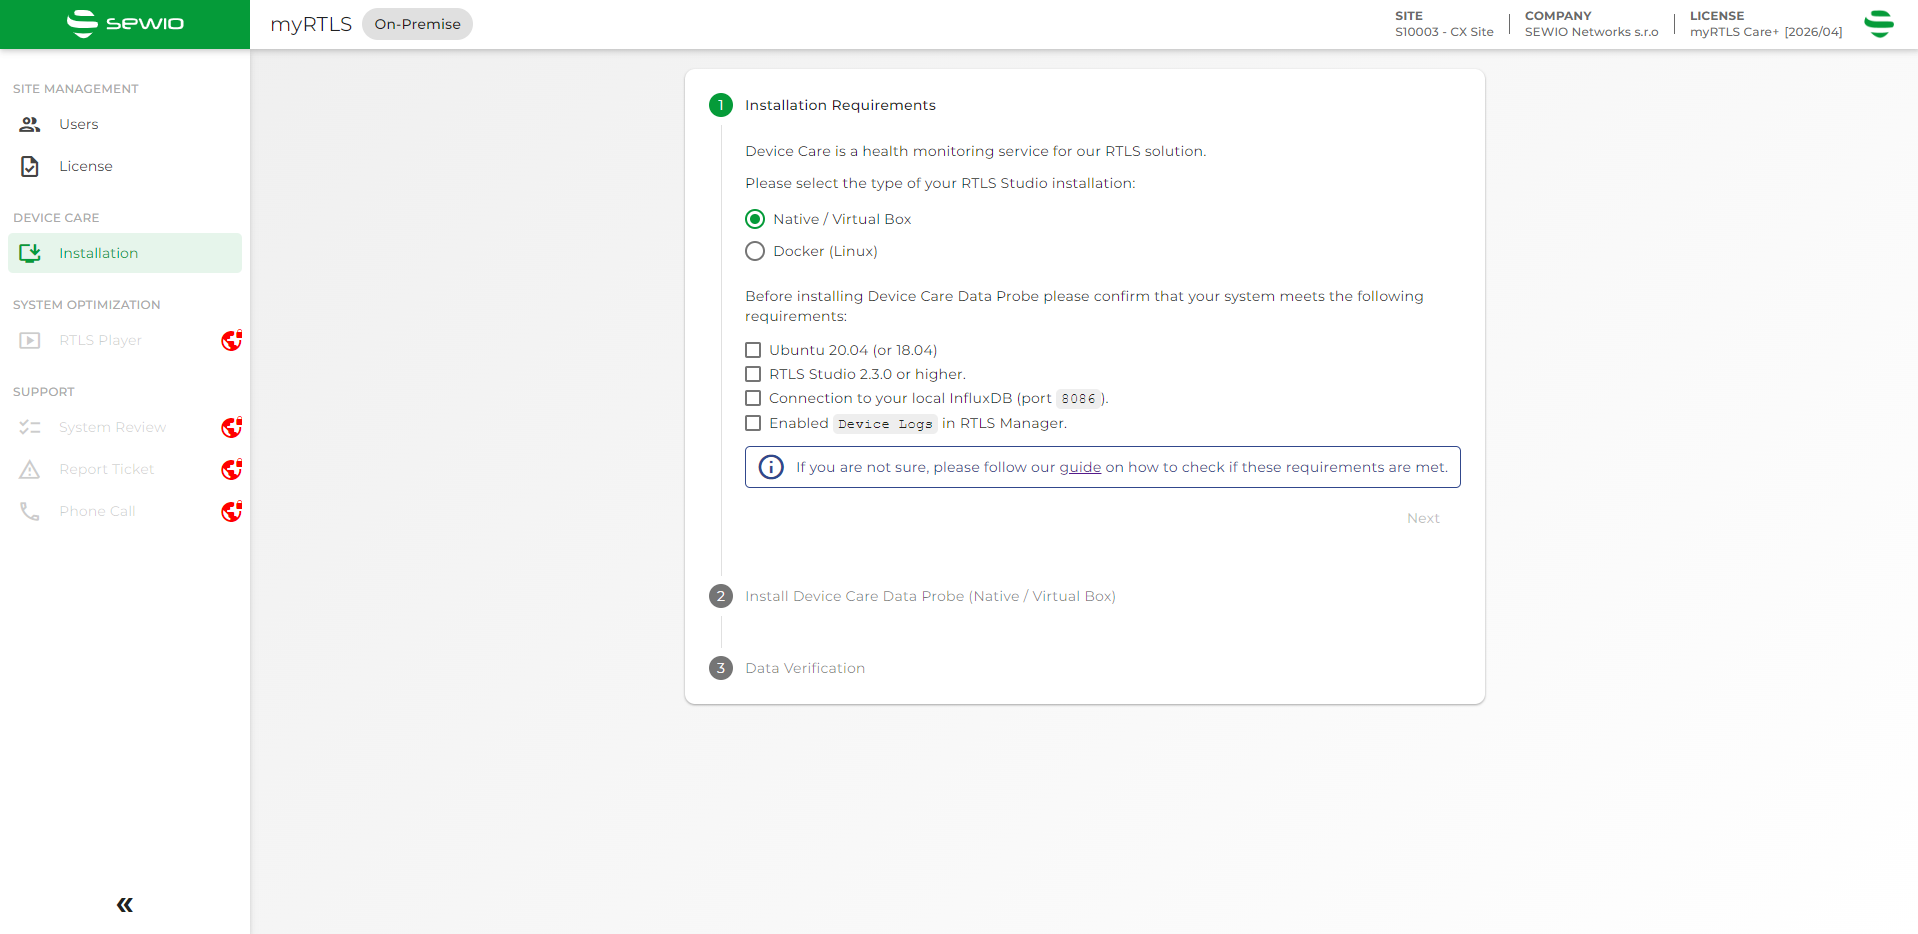
- Now, the next step you have to install Device Care Data Probe to your RTLS Server (where RTLS Studio is located) to start collecting and sending data from RTLS Studio to myRTLS On-Premise.
- See more details on page Device Care Installation.
If you have any issues with access to myRTLS Cloud or any troubles establishing the cloud connection, feel free to open a ticket on Sewio Service Desk.
For myRTLS On-Prem you need to add a new license manually when you do extension or renewal → How to change the license for myRTLS On-Premise version?
On this page: