Anchor Restriction
As the fourth step, select the neighbor anchors of each master anchor manually. You can use the anchor restrictions tab in Sensmap for that. This tool will basically restrict, which neighbor anchors belong to selected master anchor(s) and vice versa.
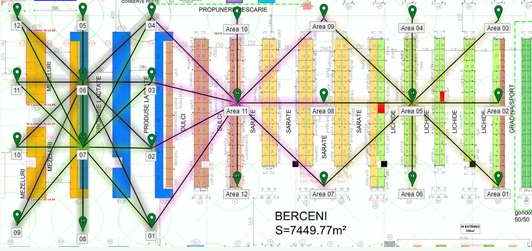
In situations where anchors do not have a direct line of sight at each other or are placed in completely different localization cells, the use of master restrictions is necessary. The restriction tells the masters with which anchors they can be cooperating in the position calculation. This is a great tool for cell separation, filtering unwanted synchronization signals. Master restrictions could be also applied by annotating the walls.
To use it, go to RTLS tab → Anchor Restrictions in Sensmap:
You have two options called Edit Master and Create Group on how to set up Anchor Restriction.
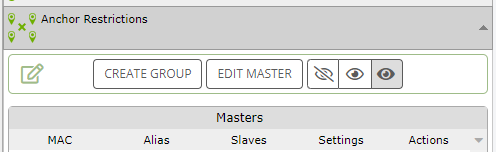
Newly from RTLS Studio 2.3, It is possible Import/Export Anchor Restrictions.
Anchor Restriction Setting can be set per each Master and its neighbors.
We assume that the master anchors for the given installation have already been set correctly. If you are not sure see the section Procedure for Master Selection.
Edit Master
Click on Edit Master and click on the desired master on the plan. In the picture below, you can see we selected the master anchor with the alias "6". You can notice that checkboxes appear next to the neighbor anchors. To select the neighbors for the given master, click on these checkboxes. An example is shown in the picture below. Here, we have set eight neighbors in retail for the given master and they all have a good line of sight conditions to the selected master. By this restriction, we can ensure that for the position calculation only selected neighbors could be used with the given master.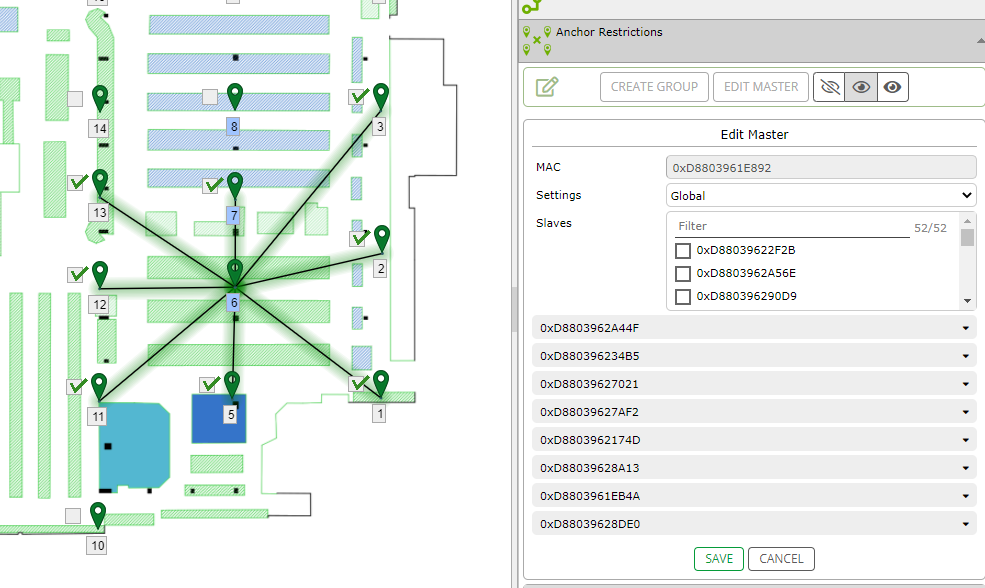
To confirm, press the green Save button.
When selecting the master anchor in the given area, always check what is the candidate anchor's score with the other anchors. The anchor that has the best score among the potential neighbor anchors (all green lines) is the best choice for the given location cell.
Now we have finished one area and we can go on to the next one.
Create Group
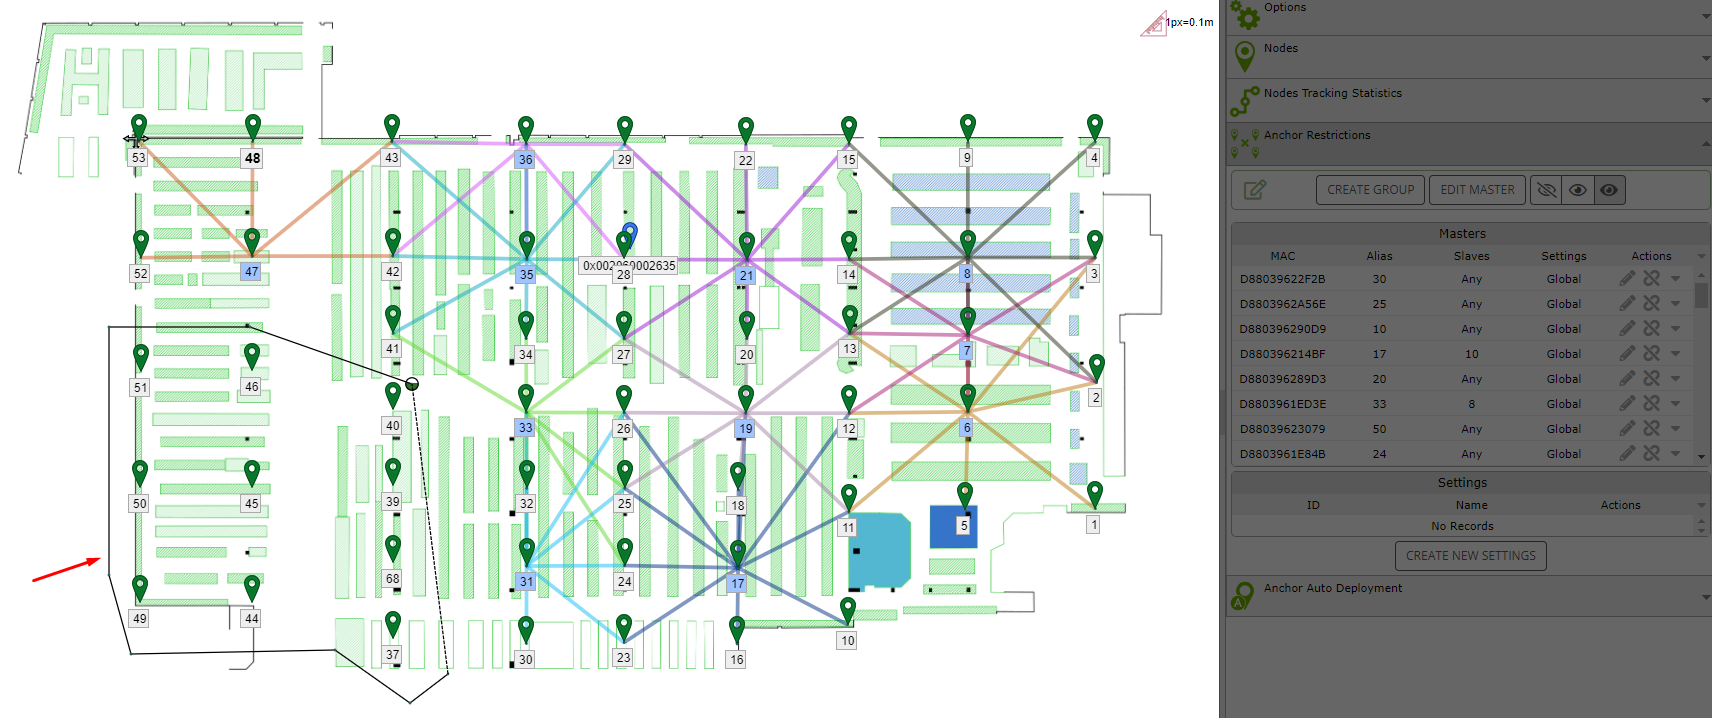
Click on the Create Group button and draw a virtual area around the real one, the process is the same as drawing zones for example. The drawn area can look like i.e., square, rectangle, or polygon (you can see it as faint dotted lines in the picture below).
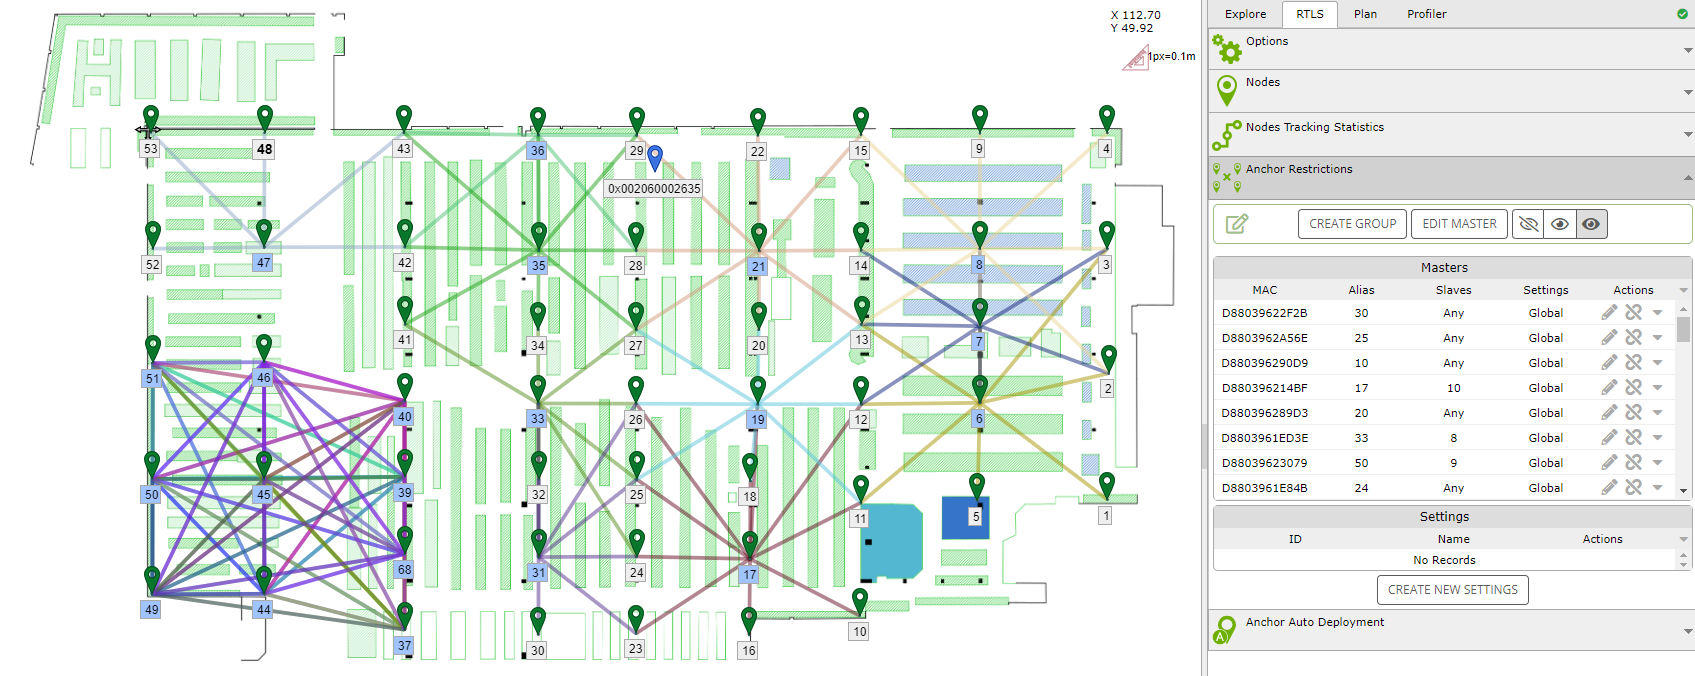
Now we have restricted the Anchors in the drawn area to receive a synchronization signal from any master outside of that room. This means that they will always receive a signal from the Master anchors in that room only (here in our case Master anchor with alias "45"). See the restriction on the picture below.
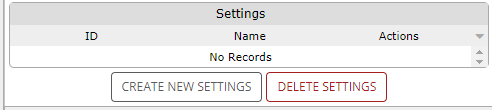
Create New Settings
A part of the Anchor Restriction in Sensmap is the possibility to create setting groups. Each master and its neighbors may have their own specific setting for position calculation. This function enables the set own configuration per localization cell.
More details about how to create the setting and what parameters you can find in sub-sections:
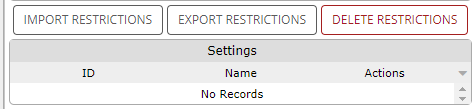
Import/Export Anchor Restrictions
RTLS Studio 2.3 and higher has got the possibility to export or import anchor restrictions. It is a very handful tool regarding configuration backup or tuning your system when used together with RTLS Player.
When you click on Export Restrictions a JSON file will be automatically downloaded. The JSON file includes all Anchor restrictions what currently are set up in your RTLS System. You can use it as a backup solution when you are going to change anchor restrictions and want to have an option to go easily back to your previous configuration.
For Import Restriction there is a JSON file required. When the JSON file is uploaded, the RTLS Studio compares MAC addresses in the JSON file and online anchors. When MAC addresses match, the imported Anchor restrictions are applied.
Create a Capture and test your configuration scenarios of Anchor restriction in RTLS Player. When you find the most suitable configuration, Export Anchor Restriction from RTLS Player and import the restriction into your RTLS System. You will avoid any possible misconfiguration in your live RTLS system.
Here is a use case. Let’s imagine that the anchors were deployed within the venue and now you need to set masters.

You have two options called Edit Master and Create Group on how to set up Anchor Restriction. Let’s start with the first one.
From Studio 2.1, Anchor Restriction Setting can be set per each Master and its neighbors.
We assume that the master anchors for the given installation have already been set correctly. If you are not sure see the section Procedure for Master Selection.
Edit Master
Click on Edit Master and click on the desired master on the plan. On the picture below, you can see we selected the master anchor with the alias "6". You can notice that checkboxes appear next to the neighbor anchors. To select the neighbors for the given master, click on these checkboxes. An example is shown in the picture below. Here, we have set eight neighbors in retail for the given master and they all have a good line of sight conditions to the selected master. By this restriction, we can ensure that for the position calculation only selected neighbors could be used with the given master.
To confirm, press the green Save button.
When selecting the master anchor in the given area, always check what is the candidate anchor's score with the other anchors. The anchor that has the best score among the potential neighbor anchors (all green lines) is the best choice for the given location cell.
Now we have finished one area and we can go on to the next one.
Create Group
Click on the Create Group button and draw a virtual area around the real one, the process is the same as drawing zones for example. The drawn area can look like i.e., square, rectangle or polygon (you can see it as faint dotted lines in the picture below).
Now we have restricted the Anchors in the drawn area to receive a synchronization signal from any master outside of that room. This means that they will always receive signal from the Master anchors in that room only (here in our case Master anchor with alias "45"). See the restriction on the picture below.
Create New Settings
A part of the Anchor Restriction in Sensmap is possibility to create setting groups. Each master and its neighbors may have own specific setting for positions calculation. This function enables set own configuration per localization cell.
More details about how to create the setting and what parameters you can find in sub-sections:
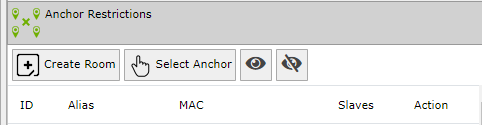
You have two options called Select Anchor and Create Room how to set up Anchor Restriction. Let’s start with the first one.
Select Anchor
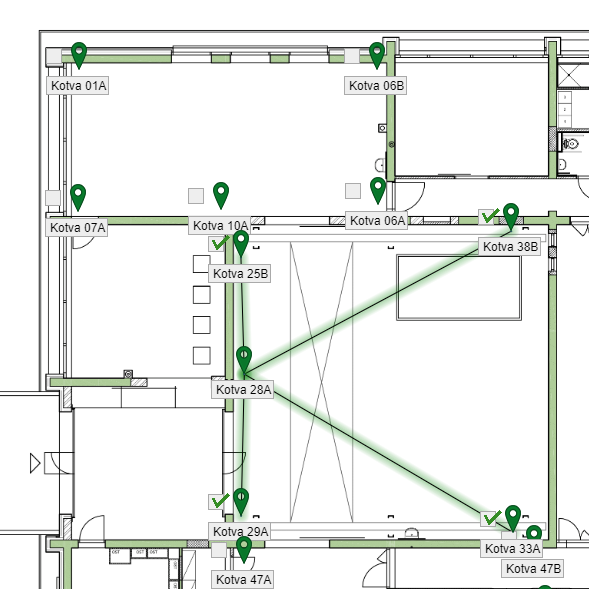
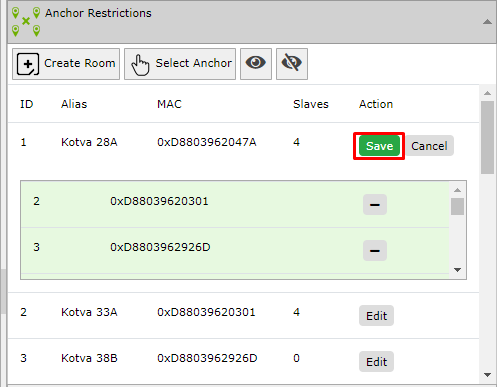
Click on Select Anchor and click on the desired master anchor. You can notice that checkboxes appear next to the anchors, when you press the button. To select the neighbors for the given master, click on these checkboxes. An example is shown in picture bellow. Here, we have set four neighbors in one room for the given master and they all have good line of sight conditions to the selected master. By this restriction we can ensure that for the position calculation only selected neighbors could be used with given master.
To confirm, press the green Save button.
When selecting the master anchor in the given room, always check what is the candidate anchor's score to the other anchors. The anchor that has the best score to the potential neighbor anchors (all green lines) is the best choice for the given room (location cell).
Now we have finished one area and we can go on to the next one.
Create Room
Click on the Create Room button and draw a virtual room around the real one, the process is the same as drawing zones for example. The drawn room can look like in picture (faint dotted lines).
Now we have restricted the Anchors in the drawn room to receive a synchronization signal from any master outside of that room. This means that they will always receive signal from anchors in that room only, these will have much better LOS conditions, and this will in turn yield a better positioning performance in the given room.
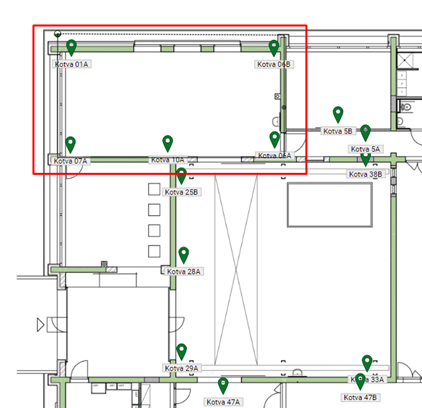
We need to go back to RTLS Manager to configure the new masters. If you want to check which masters you have selected, you can do so by clicking the eye symbol in the “Anchor Restrictions” section. The selected masters will be highlighted with green color:

Then you can choose anchor and see how is anchor restriction set.
We can see that in the top left room, any of the selected anchors can be a master. But in the right bottom room, only anchor “Kotva 83B” can be set as master. Next step will be to select new masters according to anchors restrictions.
How to Use Anchor Restriction Properly
WRONG
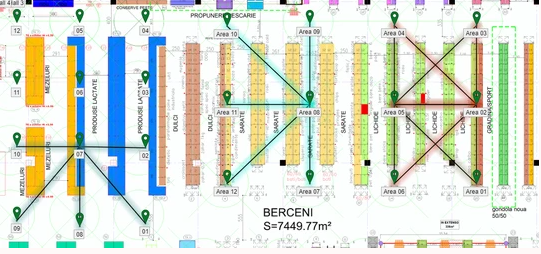
CORRECT