Pick-by-light Application
The pick-by-light is a simple demonstration application of the backchannel. This application allows you to control the user LED on the tag.
Typical use-case: If someone is looking for one tag that is placed in a big group of tags in a small area - the user can just trigger the LED blink on the particular tag so that he finds it instantly.

Tag Leonardo Button and LEDs positions.
The application is controlled via the server’s REST API.
It allows the user:
to turn OFF the LED, turn ON the LED for the defined time,
to trigger the blinking of the LED for a defined time with a defined period and pulse width,
to get the current state of the LED - single time or periodically with a defined period.
Enable Backchannel on Tag
The backchannel is disabled by default after and also after factory reset on tags
Backchannel can be enabled using the Sewio Leonardo Configurator app.
The backchannel is enabled by a setting of the Backchannel Period and Backchannel Sleep Mode Period.
If these parameters are set to 0, the Backchannel feature is disabled.
If the Backchannel Period is greater than zero, the tag goes to the Backchannel mode - send BC blink and switch to the RX mode after every Xth blink.

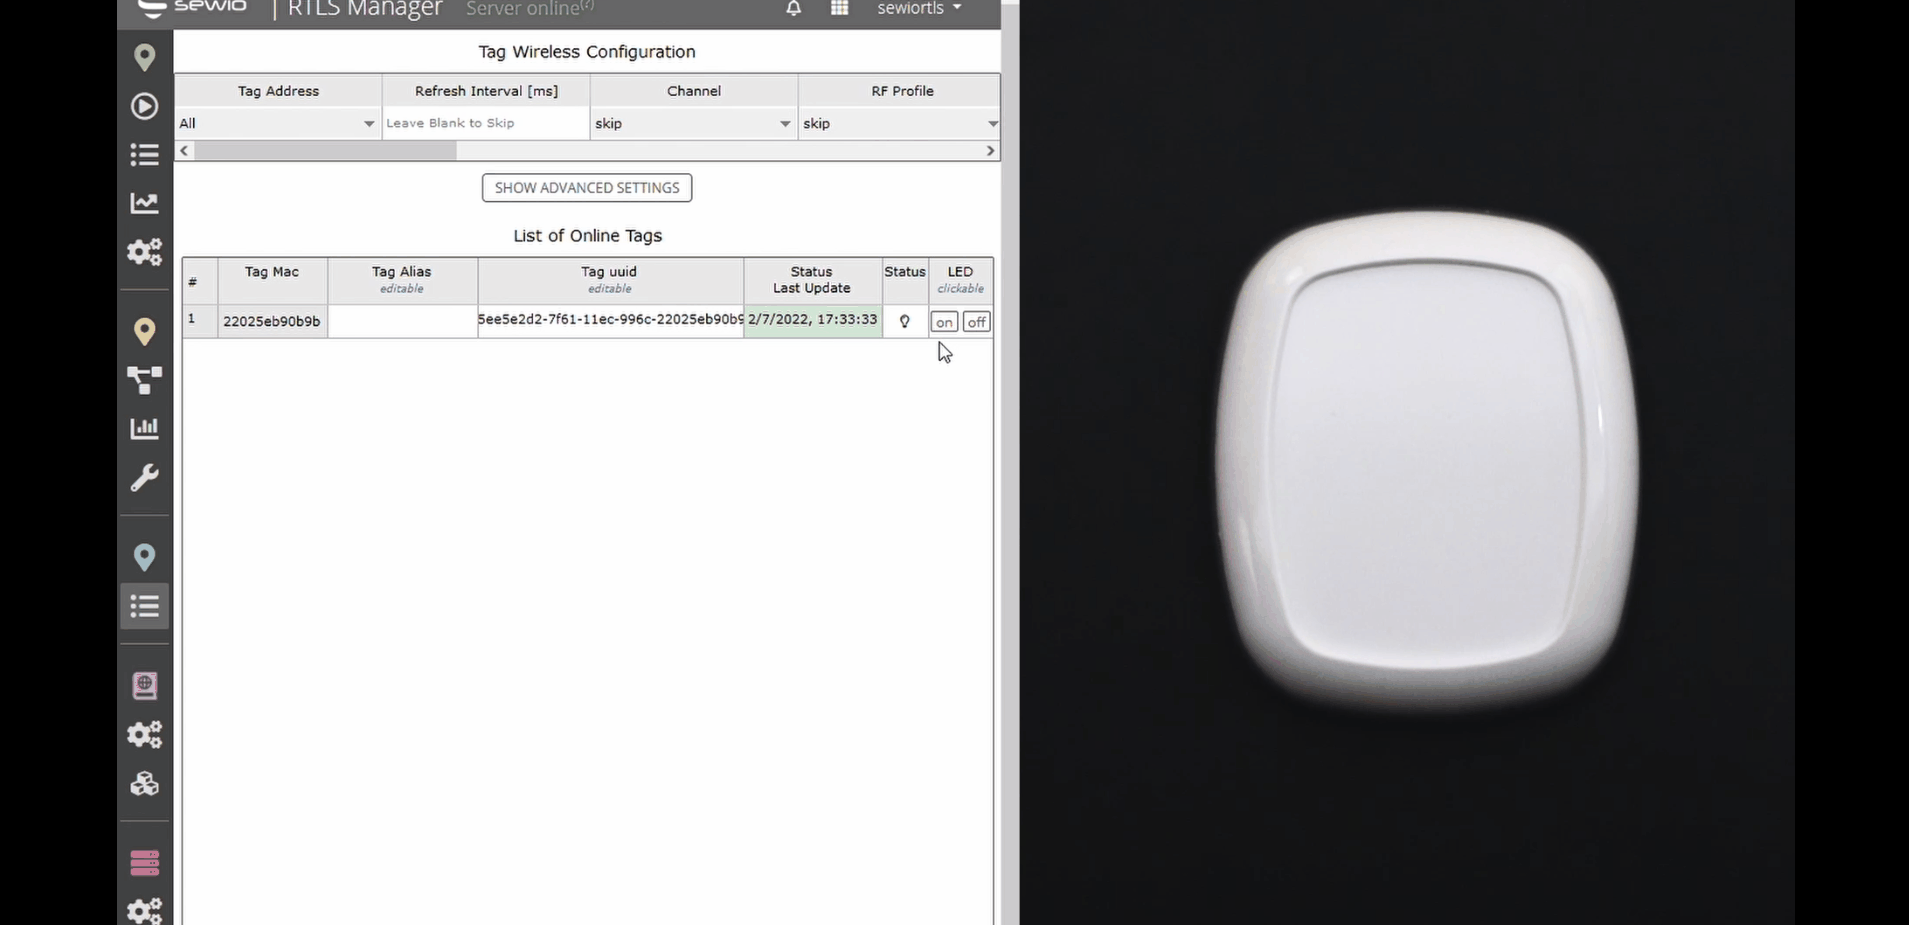
Control LED using RTLS Manager
The easiest way to try out of Pick-by-light application is to use the RTLS Manager in RTLS Studio. There are two LED buttons in RTLS Manager → Tag Summary.

LED Blink ON Button - Click Event
This is what happens in the background:
Once you click on the ON button in the LED column, the RTLS Manager automatically finds the best anchor to send the LED_ON request from.
Then it calculates a suitable timeout for this request.
Sent request to tag through anchor with a predefined period and predefined pulse width. The request also contains the total time of blinking which is preset to 60s.
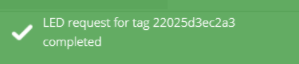
RTLS Manager shows you some status notifications. If everything goes OK, you should see the following popup message.

The estimated maximal time is calculated based on the tag settings. Once the request is successfully delivered to the tag and the RTLS receive the Acknowledgement of it, the following notification should pop up:
At the same time, you will see the green bulb in the status column of Tag Summary and the LED on your tag should blink. The blinking will be automatically stopped after 60 seconds.
Un unhappy cases, you may see error message
The RTLS Manager did not receive any blinks from your tags for a long period. In this case, the RTLS Manager is not able to choose any anchor that is suitable to send the request to the tag and you will see the following notification: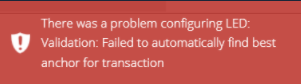
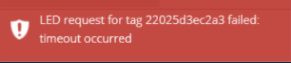
The RTLS Manager successfully find an optimal anchor to send the request for the tag, but the anchor was not able to send the request to the tag. There could be two possibilities:
The tag is in the Sleep Mode and has disabled Refresh Interval in Sleep Mode. In this case, the tag does not send the blink at it is also not able to receive any backchannel requests. You have to move with this tag during the next try of sending the request, disable the Sleep Mode, or set some non-zero Refresh Interval in sleep mode.
The tag got out of range of the selected anchor before the request was sent to it.
In both mentioned cases you should see this message in the RTLS manager:
LED Blink OFF Button
If you want to turn off the LED flashing after less than 60 seconds, you may do it through the OFF button in the LED column in the RTLS Manager → Tag Summary.
It will stop the blinking immediately once the tag receives the request. The Blink OFF button works in the same way as the blink ON button and the notification after the button click is the same as in the case of the blink ON button.
Backchannel REST API
The RTLS Manager uses the REST API to send the LED ON and LED OFF requests.
If you want to understand how it works in the background in greater detail or if you would like to try sending a blink request with different parameters, please read the following page How To Control Tag's LED via REST API.
On this page: