How To Control Tag's LED via REST API
Here we would like to provide a general overview of the backchannel feature on a practical example of the pick-by-light application.
REST API
Basically, there are three endpoints for the backchannel:
two application-specific endpoints for remote controlling of LED on a given tag
single general endpoint for sending custom backchannel messages to tags
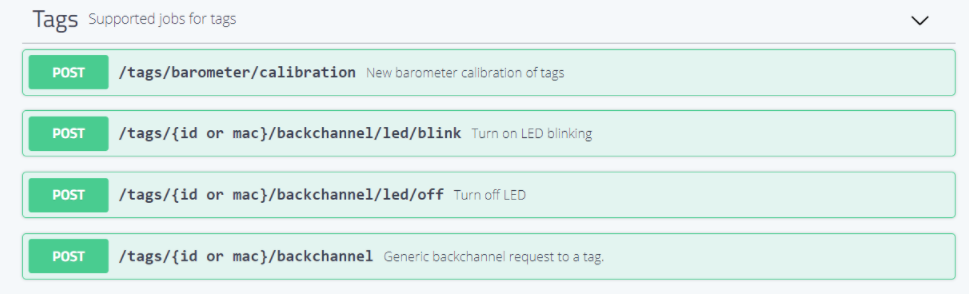 Screenshot of Interactive REST API related to backchannel
Requests listed above can take from milliseconds to minutes, depending on Tag settings. Therefore there is a JOB approach used to handle HTTP requests with a long response time. So, firstly user gets an immediate answer about the job acceptance (HTTP 202 JOB_ID) and later he can poll for job status via HTTP GET JOB_ID request.
For testing purposes interactive REST Swagger documentation is recommended. It is available: http://[RTLS STUDIO IP]/documentation/api-rtlsmanager.
LED Blink Request - POST /tags/{id or mac}/backchannel/led/blink
This request triggers the LED blinking on the selected tag.
You can find example of the request below. Just place your tag’s MAC address or id to the id or mac label and click Execute.

Once you do it the server creates a request and sends it to the anchor, which was found as optimal for sending a backchannel request to chosen tag.
If everything goes well, you would see the following response:
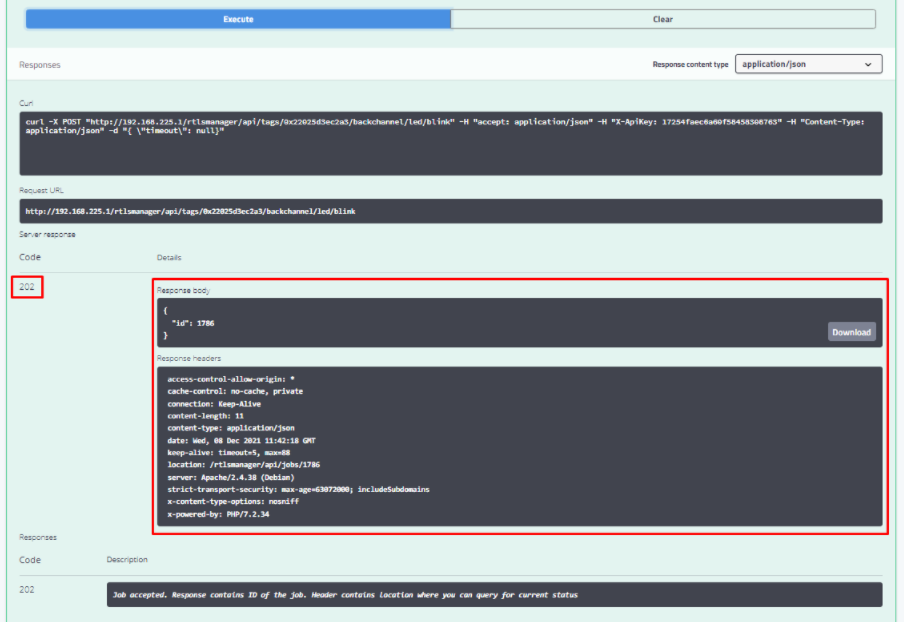
If the response code is 202, the Job was accepted, and the request was sent to the anchor.
The response code 202 doesn’t mean that the response was successfully delivered to the tag.
The LED on the tag should start blinking within a while (latency is depended on the Tag Settings).
If you need to check if the request was delivered to the tag you can use GET /jobs/{id}. See it below.
LED OFF Request - POST /tags/{id or mac}/backchannel/led/off
This request can be used to turn OFF the LED on the defined tag.
The request is equal to /led/blink, so the behavior and response.
Getting Status of the Job - GET /jobs/{id}
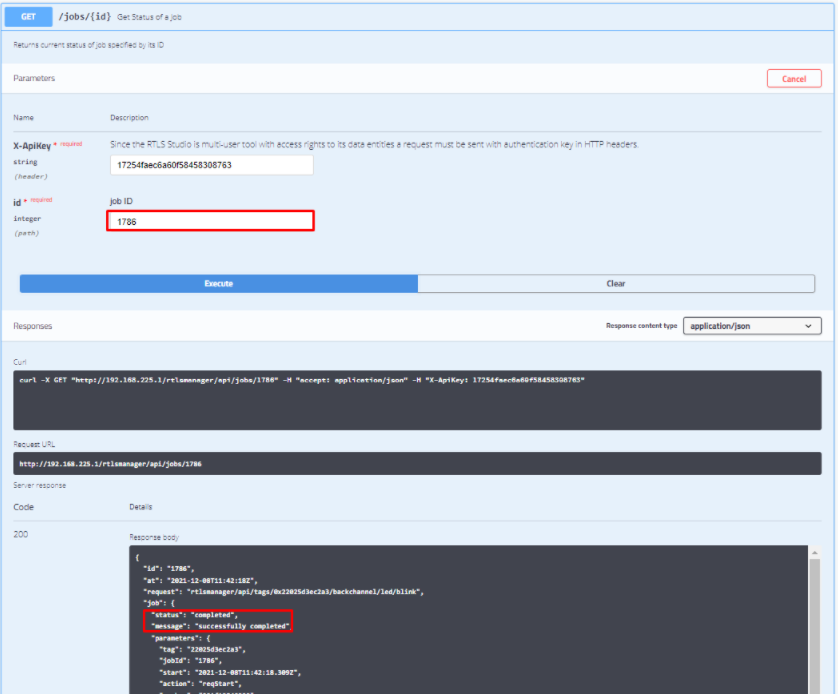
The ongoing status of the given job is done via GET /jobs/{id}
You need to know job ID. Just put value into id label in the GET /jobs/{id} interface and click Execute in Swagger.
The Swagger immediately returns the Response, where you can see, if the job with a defined id was successful or not. If you see "status": "completed", "message": "successfully completed" in the response, your request was successfully delivered to the tag.
Send Custom Payload - POST /tags/{id or mac}/backchannel
This is a general backchannel job that allows the user to send backchannel requests with an arbitrary payload at the application layer.
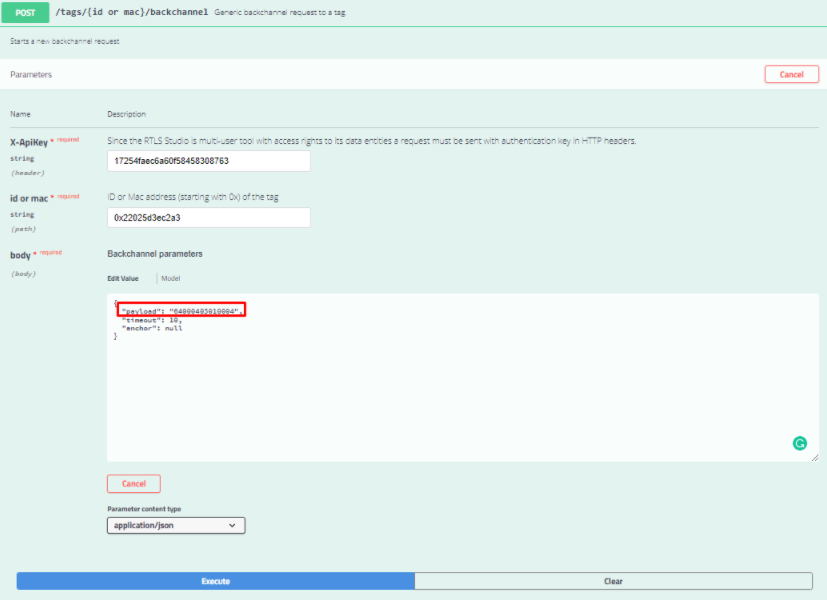
Payload REQUIRED
The backchannel request that should be sent to the tag must be filled into the payload field in the body.- Timeout and anchor are mandatory fields
Get Response From Tag
The tag-side of the Pick-by-light application should send some response to all server requests.
These requests can be obtained using job GET /tags/{id}/datastreams/{datastreams_id}.
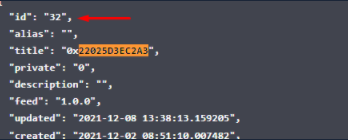
This job takes tag’s {feed id} not MAC address. So there is a need to find out the feed id of your tag first. It can be done using job GET /tags.
Get the tags ID - GET /tags
This job allows the user to get a listing of all tags. In this list can be found the MAC address of the required tag and found out his feed ID, which is necessary to get his datastreams.
In the REST API documentation go to the GET /tags job and click Execute.

In the response, you can match the MAC address to the corresponding feed id. This id will be used to get the tag datastreams.
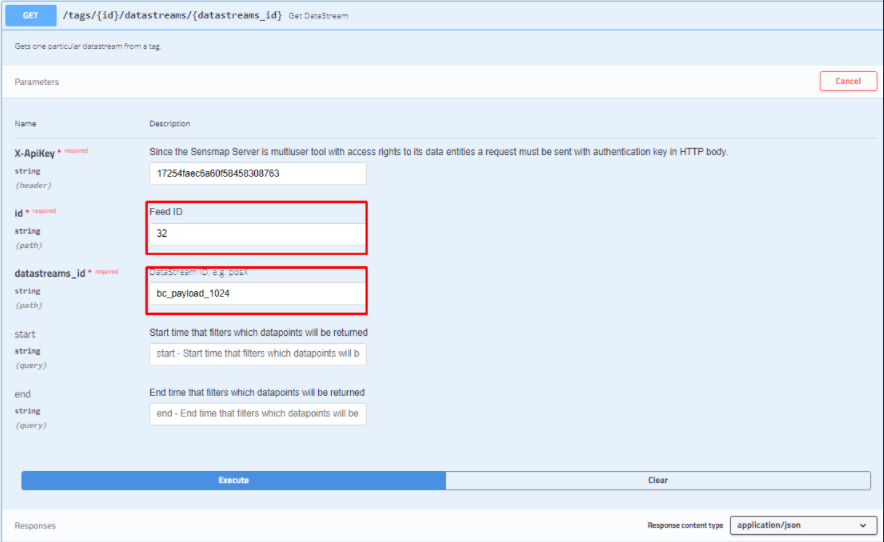
Get All Datastreams from APP - GET /tags/{id}/datastreams/{datastreams_id}
The responses from backchannel applications are identified by their IDs. The Pick-by-light application has ID 1024, and its datastream is bc_payload_1024.
GET/tags/{id}/datastreams/{datastreams_id} with the above-mentioned parameters.
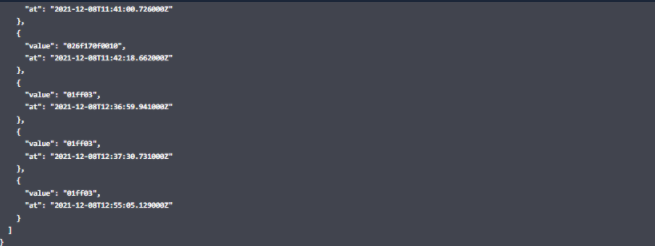
As a result of executing this job, the server returns the response, that contains all responses from the application.
On this page: