Network - Wi-Fi
The RTLS Wi-Fi kit includes one wireless router GL-AR300M.
☝🏻Wi-Fi deployment only for small demos and a technology presentation like RTLS Kit Deployment. Our recommendation is to use wired solution for a project or PoC.
Wi-Fi Topology and Network Planning Rules
The Wi-Fi network topology should follow the example below:
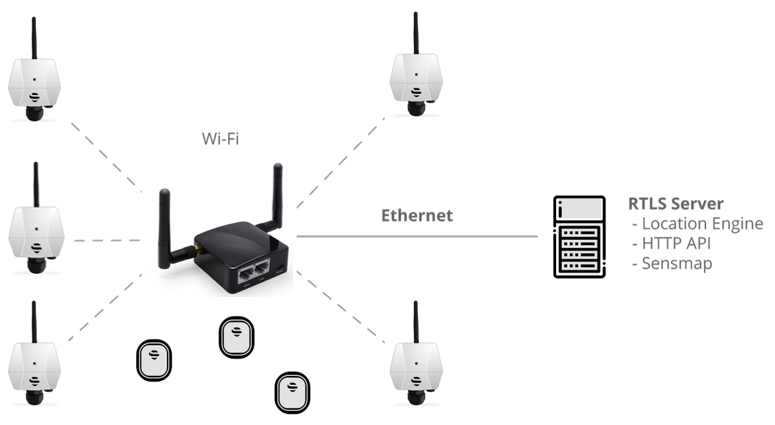
The anchors in square geometry connected wirelessly to the access point (AP). Then access point located in the middle of the localization cell and via cable connected to RTLS Server or laptop with RTLS Studio.
Wi-Fi network planning for RTLS system must follow rules below:
- The recommended number of anchors per AP is up to 5.
- Make sure that the Wi-Fi network for RTLS is not in interference with other Wi-Fi networks nearby.
- The signal strength of Wi-Fi needs to be better than -67 dBm on each Anchor. The Wi-Fi network should be dedicated just for RTLS Anchors.
- TCP synchronization needs to be set. UDP synchronization is not recommended for wireless deployment even via single AP.
- Powering the Anchors needs to be solved → Anchors Vista line supports powering just via Active or Passive PoE.
On this page:
Router GL-AR300M Configuration
The router is delivered to you in default configuration from the manufacturer. Therefore, it is necessary to setup the router for the required setting to be able to interconnect anchors via wireless network for RTLS deployment purposes.
For router configuration please follow these steps:
- Plug the router to power supply via micro USB connector. You can use any USB charger as a power supply. Connect your computer to its LAN port by using an Ethernet cable. Be sure that the Ethernet interface is set as a DHCP Client.
Open your web browser and type in the following IP Address: 192.168.8.1.
Choose language and go next.
Type in a new password rtlswifi and click submit.
- Click on WIRELESS and Modify the Wi-Fi settings.
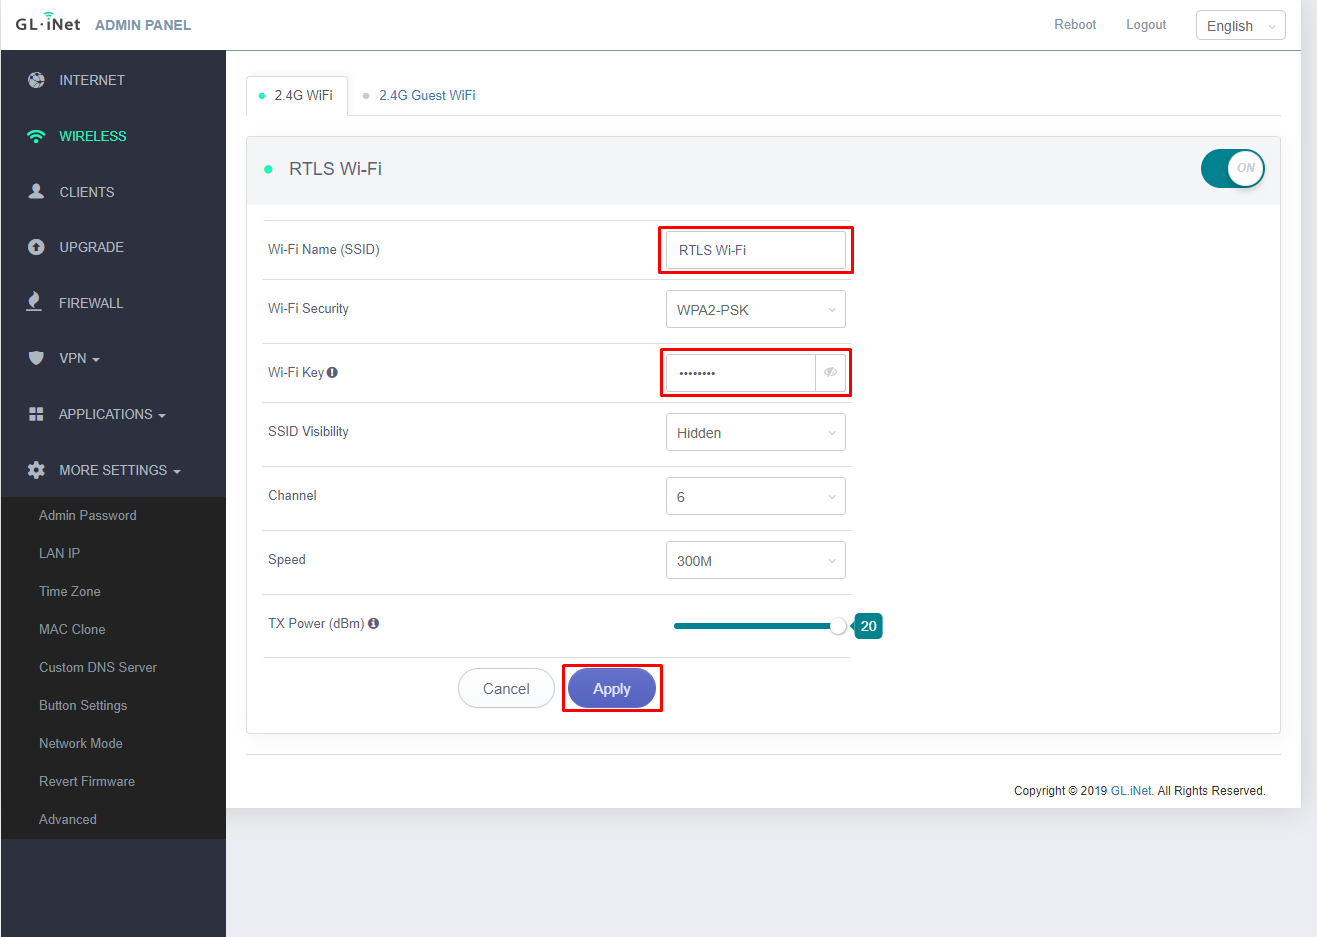
- Change Wi-Fi Name (SSID) and Wi-FI Key (password), which is set on Anchors.
Wi-Fi Name: RTLS Wi-Fi
Wi-FI Key: rtlswifi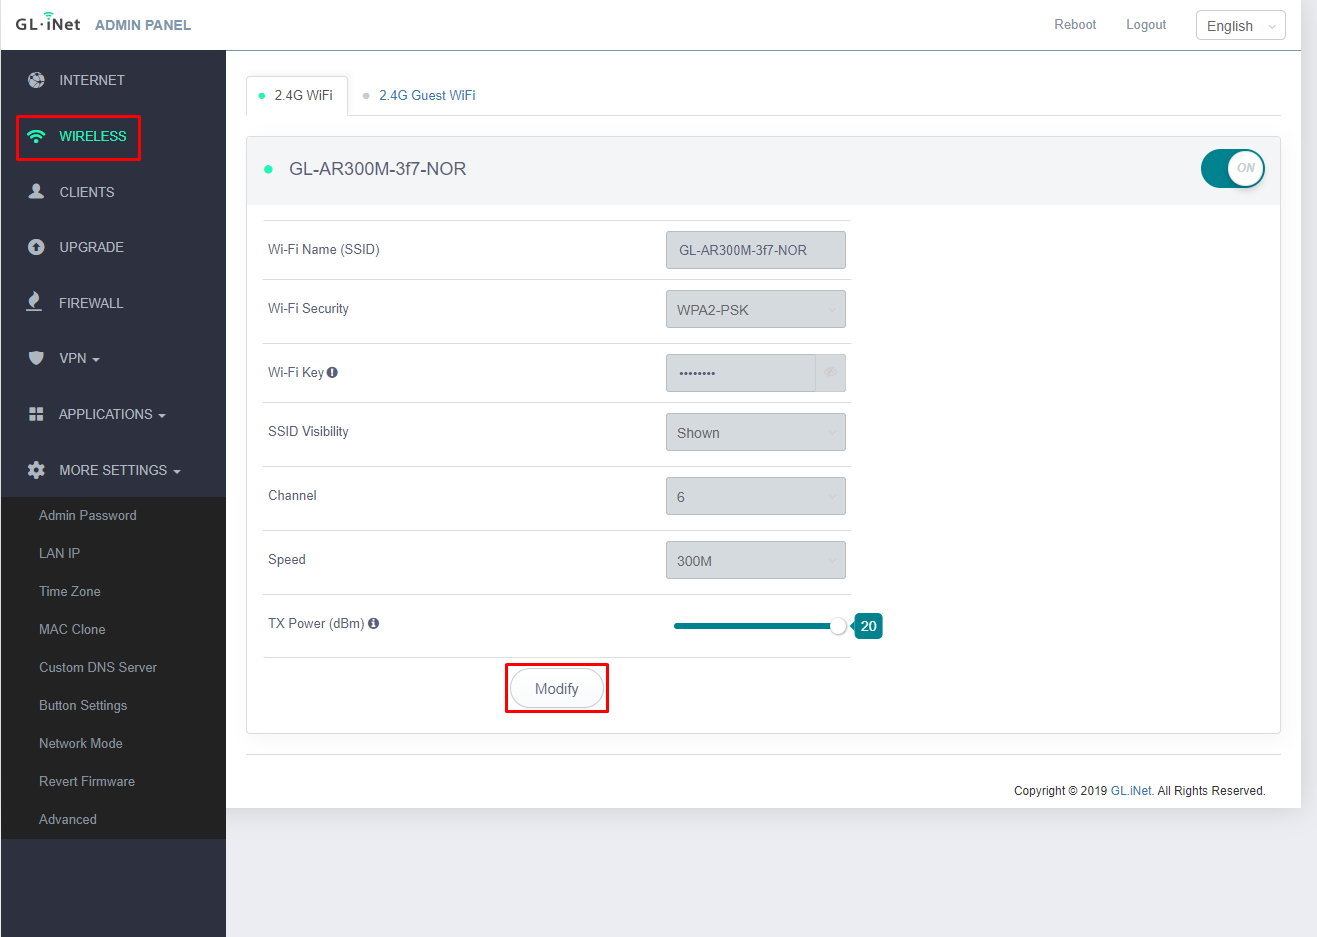
- Go to the section MORE SETTINGS and LAN IP settings.
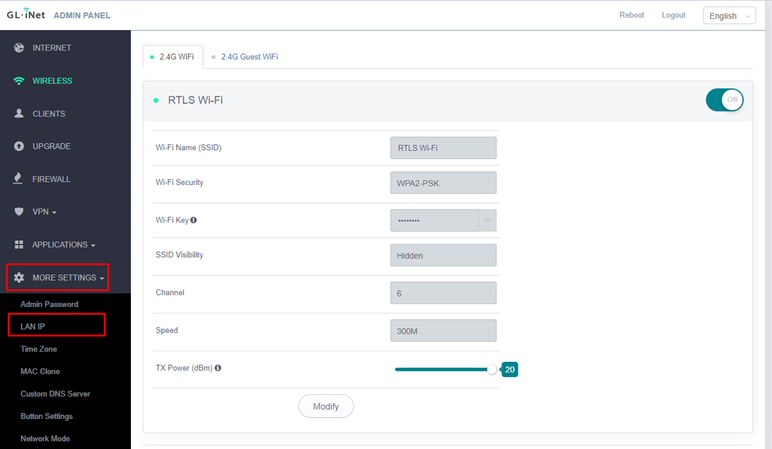
- Change default router address to new IP address: 192.168.225.1.

- Wait until the router reboots. If it does not redirect you automatically, type in the new IP Address: 192.168.225.1.
- Then the router setup is complete. The new credentials are:
Username: root
Password: rtlswifi - Now you can start deploying the Anchors.
If any issue during the configuration of the router you can check ONLINE GUIDE in the manufacturer website.
Cisco RV110W Configuration
If you have an older RTLS UWB kit with Cisco router RV110W the configuration you need to follow configuration steps described in PDF file. The configuration file that needs to be loaded into the Cisco router is here.