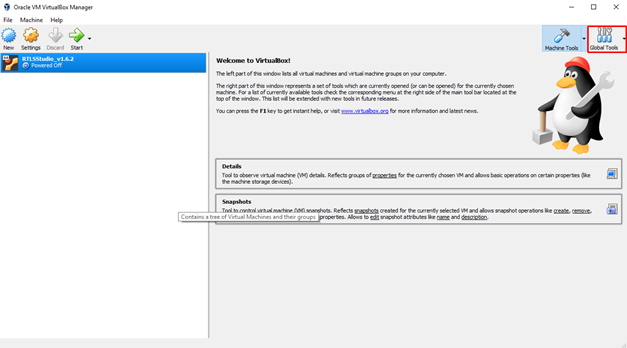
FAQ - RTLS Kit and VirtualBox
Question List
Guest loss network connectivity with VBox if Ethernet cable is unplugged for a few seconds
The issue is well written here: https://www.virtualbox.org/ticket/15308
Workaround:
- Shutdown VBox
- Disable and enable Ethenet interface.
- Start VBox again
Low CPU Performance
Once there is not enough CPU for positioning calculation, incoming Tag blinks are buffered and calculated consecutively. So if the CPU is overloaded for a longer period of time, the milliseconds' latency between the actual position and position reported via API or Sensmap could grow to minutes!
Calculation speed heavily depends on the number of CPU cores allocated for VBox and Windows power settings.
- If the host machine contains 4 cores, only - two of them should be assigned for VBox. There should be balance; otherwise, the host or RTLS Studio would starve. If more cores are available, please allocate 2+ cores to RTLS Studio as it uses multi-threading heavily.
- Windows should be set to high-performance mode to provide optimal CPU performance. This is not the case, especially for notebooks.
Furthermore, the following RTLS Studio apps consume significant resources:
- Sensmap, especially node tracking
- RTLS Monitor
In general, for demos, you could reduce the load by decreasing the number and tags or increasing their refresh period. For a final deployment, the adequate server performance should be provided.
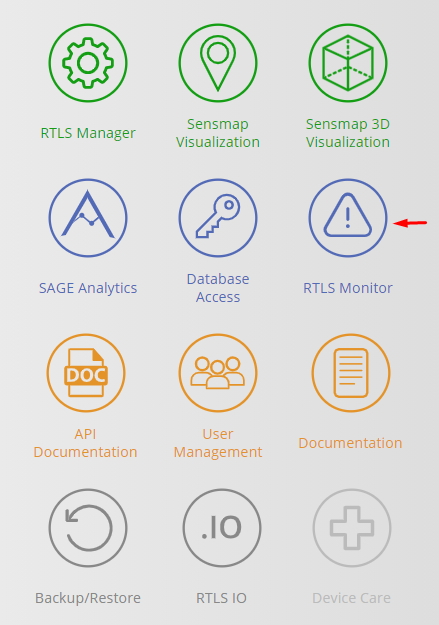
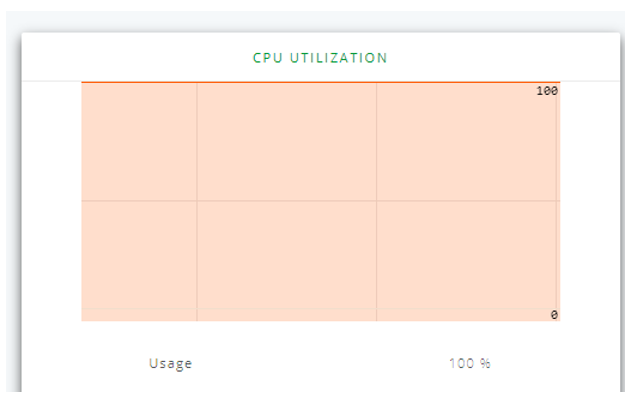
Via RTLS Monitor
It should not show more than 90% CPU utilization for 1 min avg.
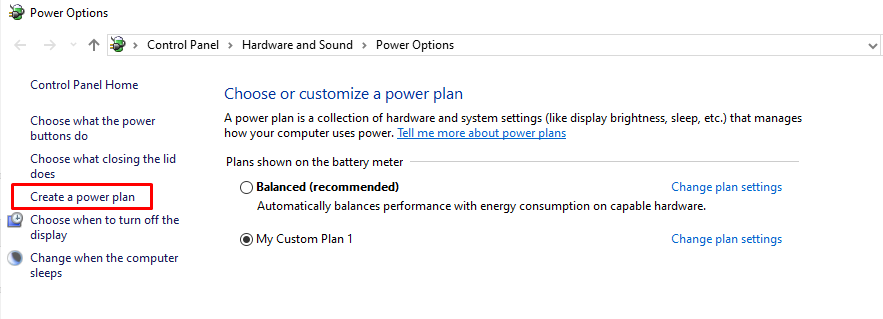
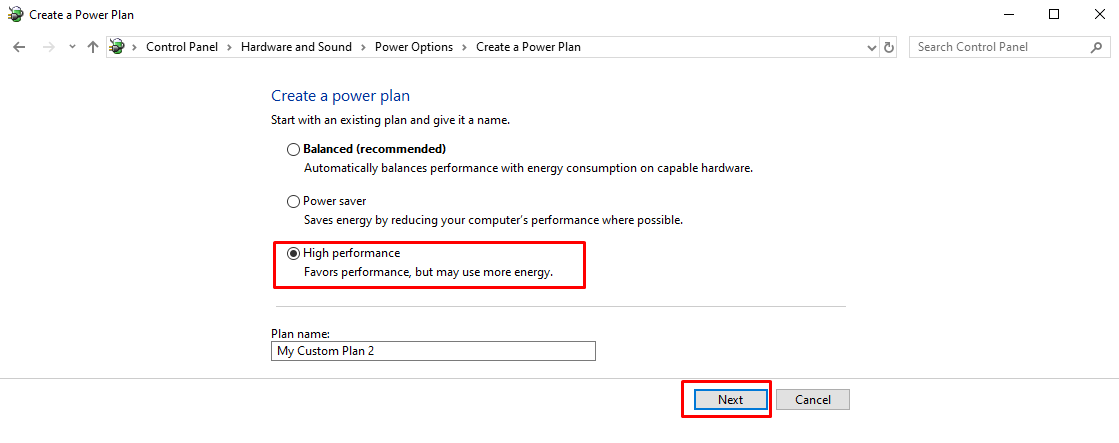
VBox RTLS Studio image must be switched off. Then click on settings:

Adjust CPU cores 2/4 or 2+/if more cores are available
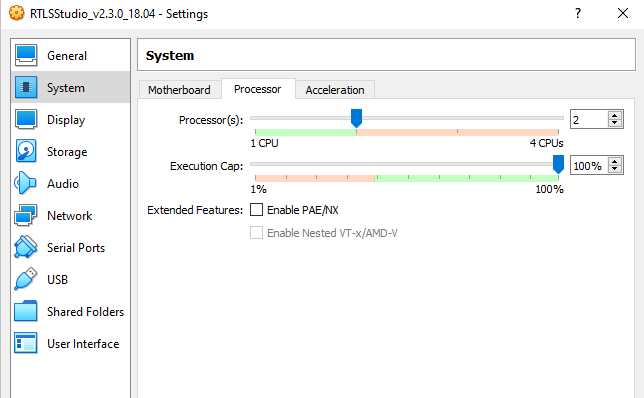
Power Options should be set to high performance
What area can be covered by RTLS Kit?
RTLS Kit can cover an area of up to 500 square meters.
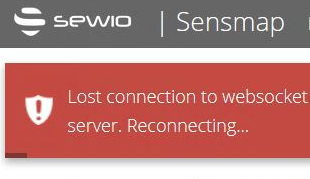
Computer with Vbox went to sleep mode and after wake up all tags became inactive / The Time Synchronization issue for VBox
Sometimes the time might not be synchronized once the host with VBox went to sleep mode, so it could introduce troubles with API data requests or showing inactive tags etc.
Requirements
- Internet connection on host computer
Procedure
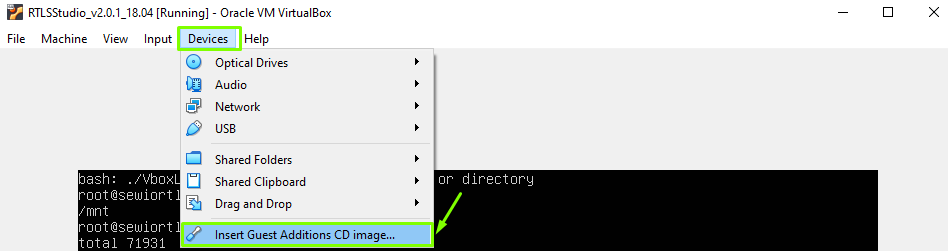
- Devices → Insert Guest Additions CD image...
- login into VBox machine default credentials (sewiortls/sensmap).
- sudo mount /dev/cdrom /mnt
cd /mnt
sudo su
./VBoxLinuxAdditions.run
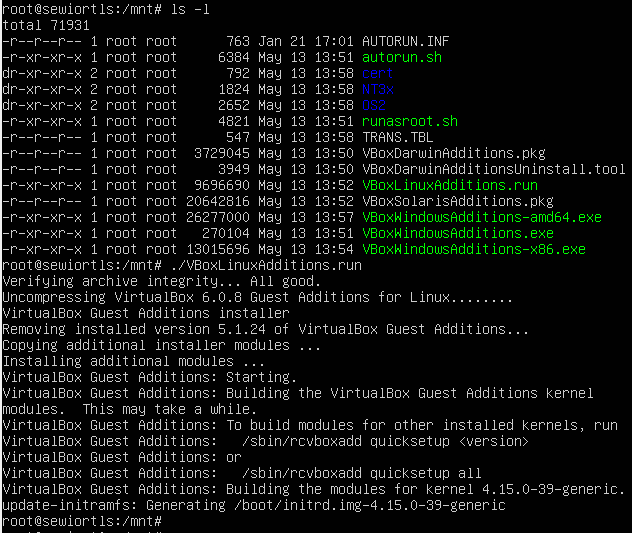
Now, the time should be sync with global time.
How to extend VirtualBox disk capacity?
Sometimes happens that you have lot of positions in DB and your virtual disk capacity is full. And you don’t want to lose your positions. But you cannot also make backup because you have no free space of the virtual disk. Then solution can be to extend the VirtualBox disk capacity. This guide will show you how to do that. Works with VirtualBox version 5.2.X.
- Go to the Global Tools (Virtual Media Manager).
- Extend capacity of correct vdi disk.
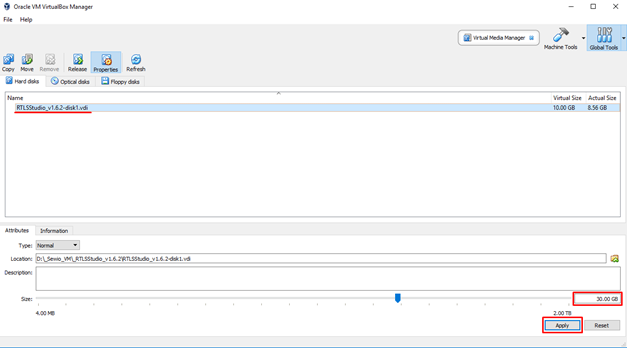
- Boot VM and log in (default login: sewiortls/sensmap).
For Ubuntu 14.04
- Run “sudo cfdisk”.
- Make “new” partition from free space.

- Select “logical”.
- Select all available space.
- Then “write” partition.
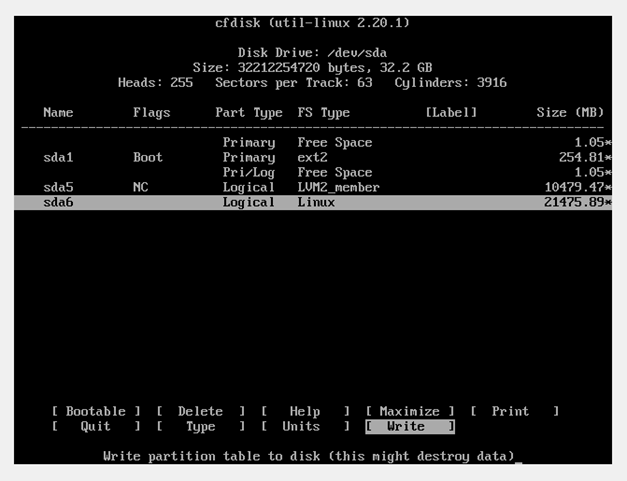
- Type “yes” to apply changes.
- “quit” cfdisk.
- Make “new” partition from free space.
- Reboot VM and log in again. “sudo reboot”.
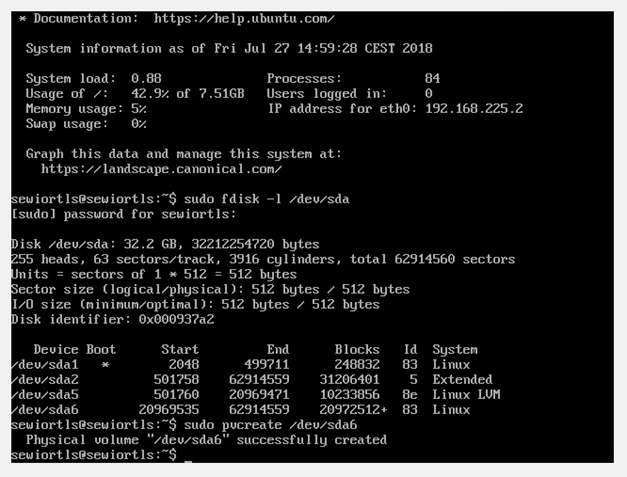
- Check your new partition. “sudo fdisk -l /dev/sda”.
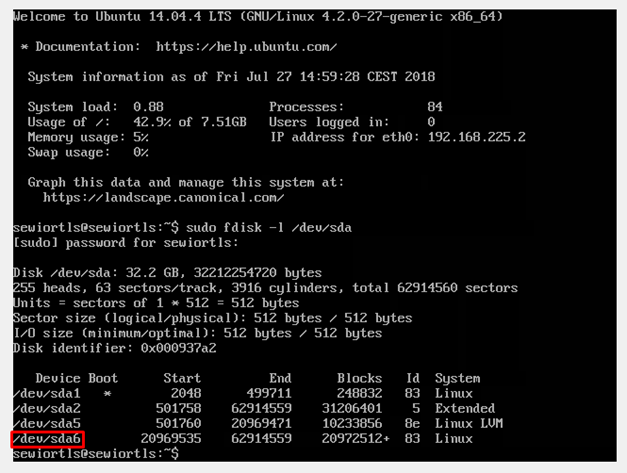
- From picture new partition is sda6, so create the physical volume. “sudo pvcreate /dev/sda6”.
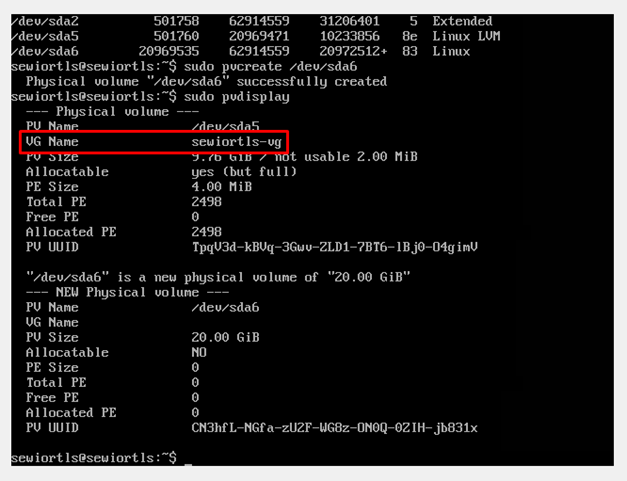
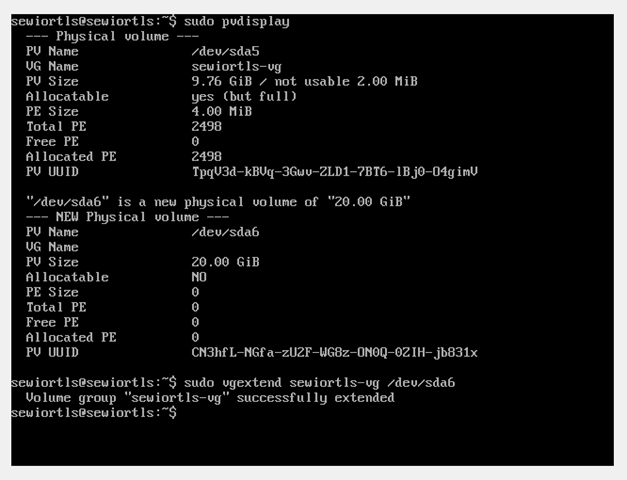
- Run “sudo pvdisplay” to show the physical volumes and note “VG Name” of current physical volume.
- Now extend your volume group by new physical volume. “sudo vgextend sewiortls-vg /dev/sda6”
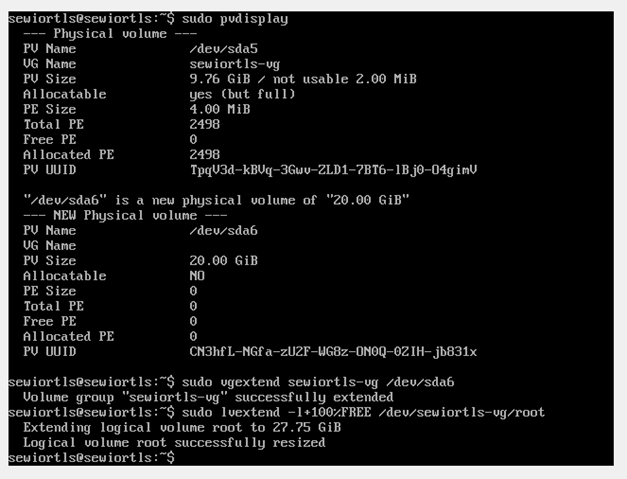
- Extend logical volume. “sudo lvextend -l+100%FREE /dev/sewiortls-vg/root”
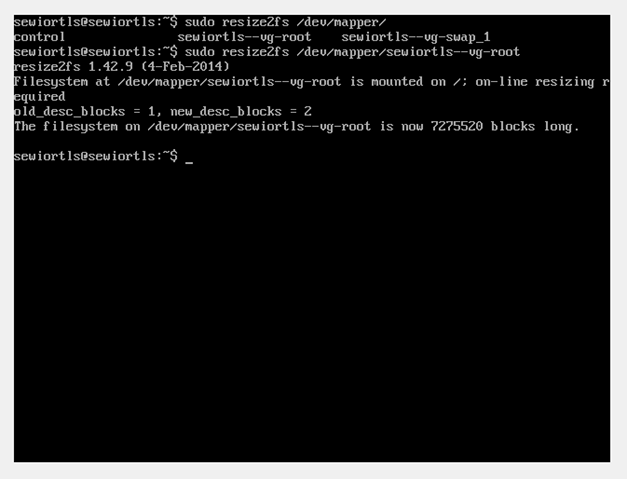
- And finally resize. “sudo resize2fs /dev/mapper/sewiortls–vg-root” (Hint: Tab is sometime very useful)
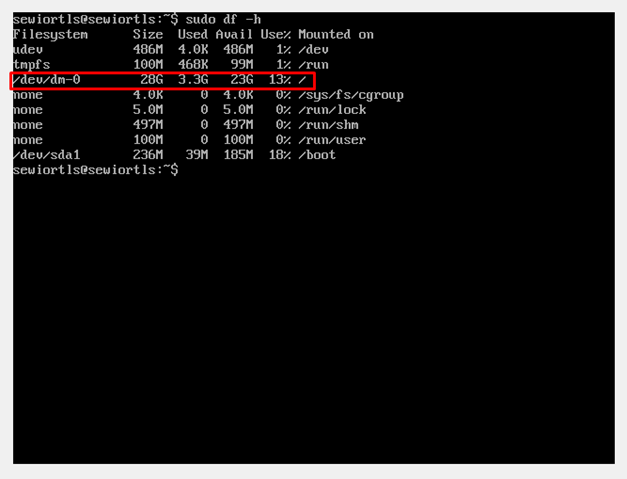
- Now check new disk space capacity. “sudo df -h”
For Ubuntu 18.04
- Run "sudo fdisk -l"
- Size mismatch should be already visible
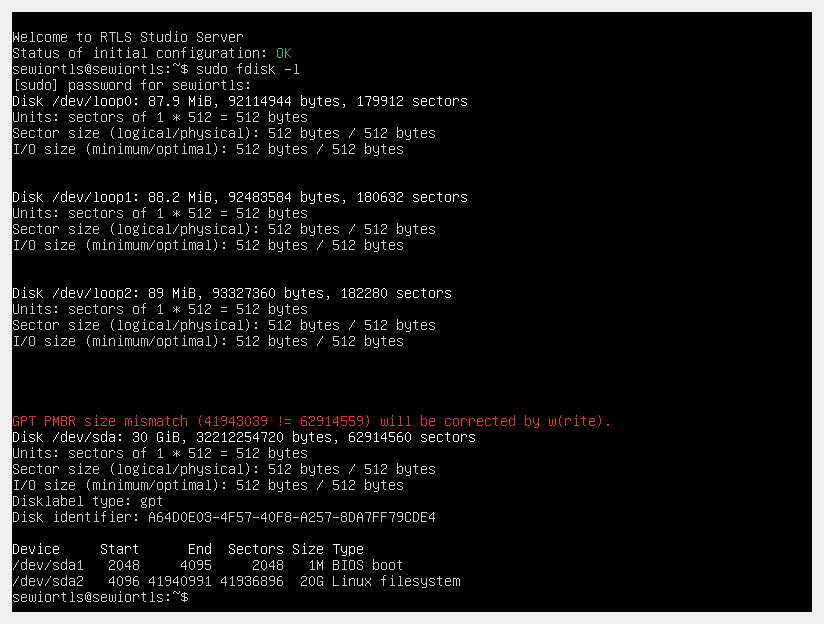
- Size mismatch should be already visible
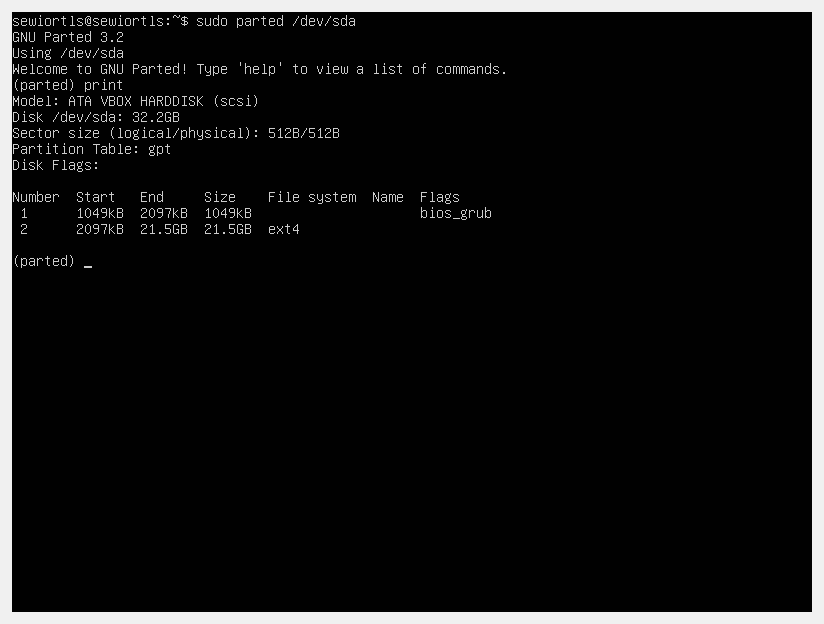
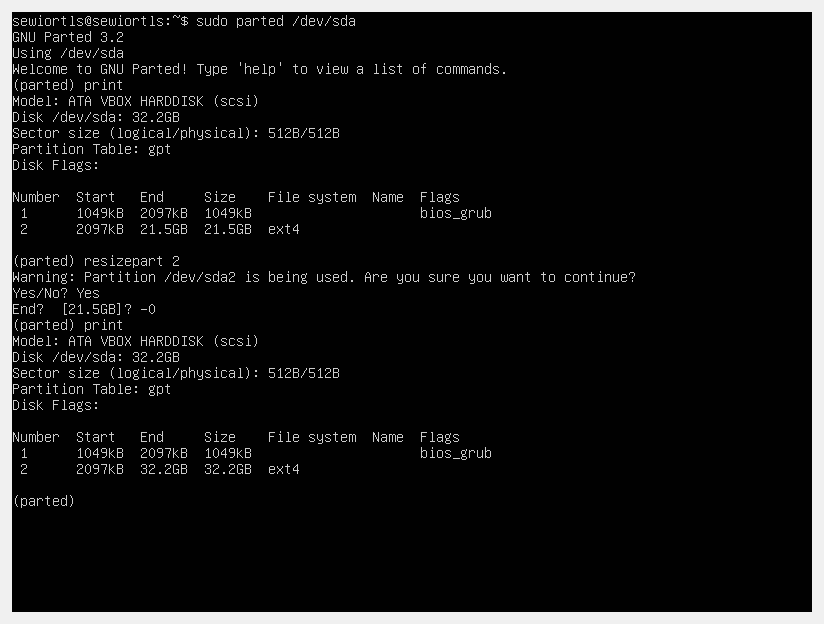
- Run "sudo parted /dev/sda"
- with "print" prompt you can see the partitions
- "resizepart 2" will resize partition sda2, confirm it with typing "yes"
- "-0" resizes it to the end of the disk.
-indicates that it should count from the end of the disk, not the start. This makes -0 the last sector of the disk - which is suitable when you want to make it as big as possible.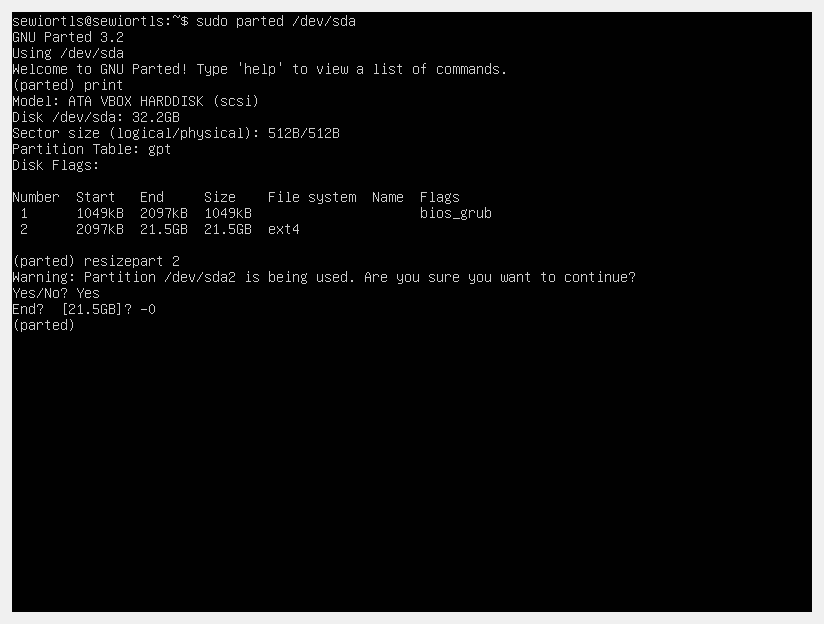
- "-0" resizes it to the end of the disk.
- now check if partition was resized correctly "print"
- "quit" parted
- with "print" prompt you can see the partitions
- And finally resize. “sudo resize2fs /dev/sda2"
- Now check new disk space capacity. “sudo df -h”
