Console Configuration and Calibration
Sensors configuration and calibration can be set also via console settings on Tag Li-Ion and Tag iMU. Tag Piccolino has no console interface.
Console Configuration
- Connect tag to your computer via USB and open a console application called TeraTerm.
- Open TeraTerm and select the correct port.

- Turn the Tag on. The Tag will ask you if you want to load a new configuration. Press Escape or wait for five seconds.
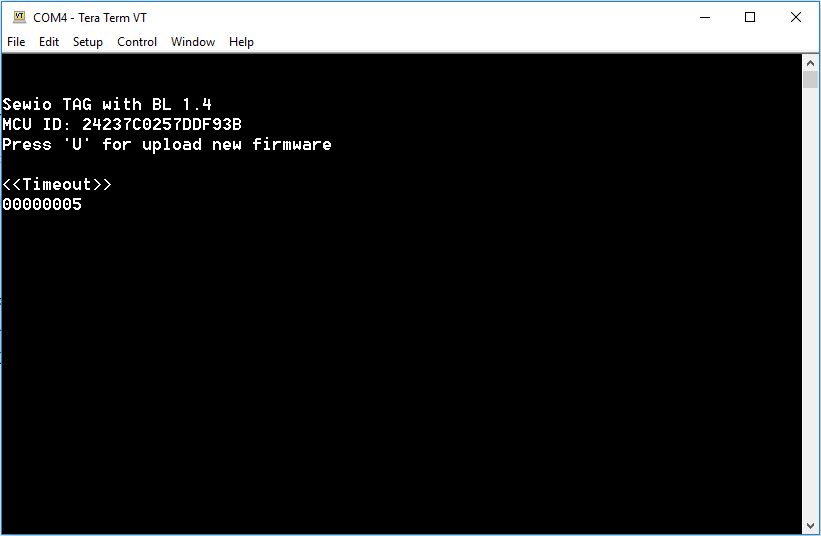
- Then it will ask you if you want to change the default configuration. Press Enter.
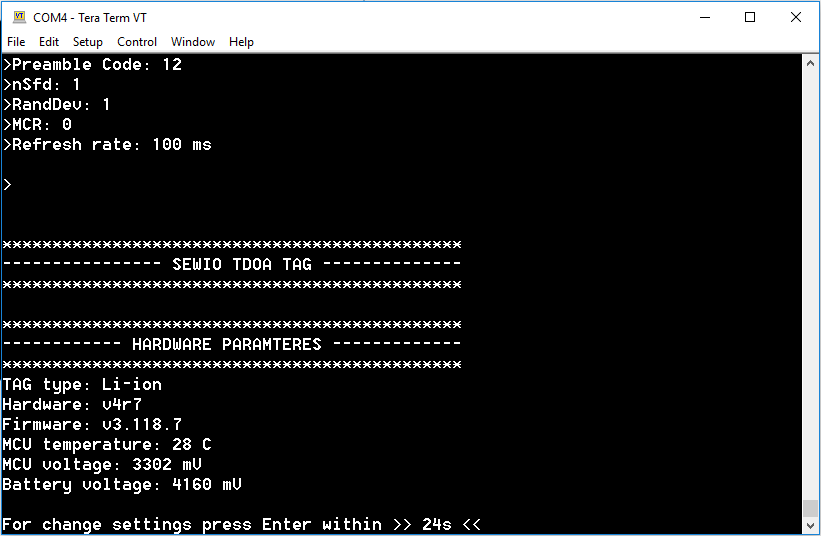
- Then you will be able to change several of the Tag’s parameters, you can skip these by pressing Enter. Look for the specific setting:
- Sleep modes (Motion detection)
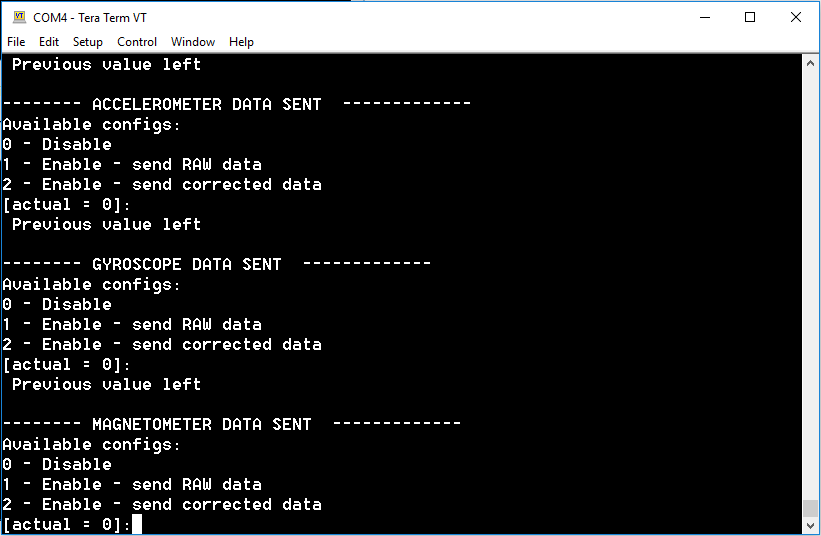
- Accelerometer
- Gyroscope
- Magnetometer
- Barometer and thermometer data
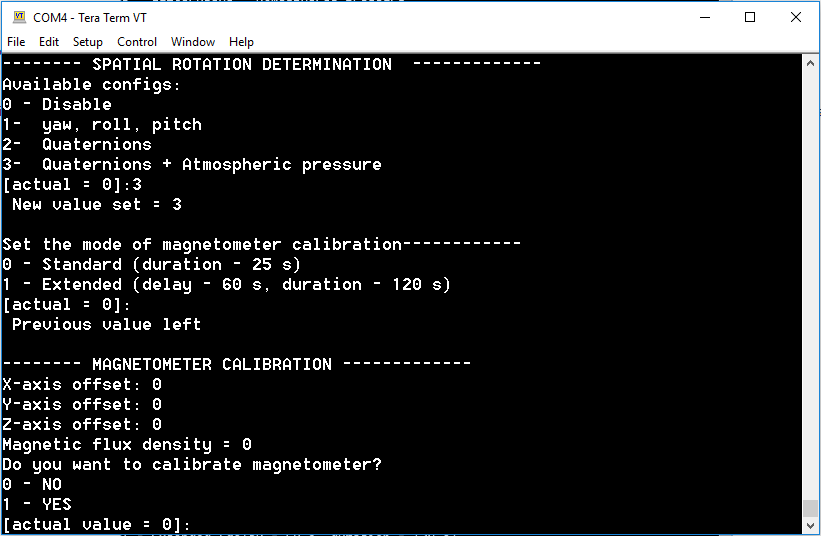
- Spatial rotation determination
- Magnetometer calibration
- Inertial measurement unit calibration
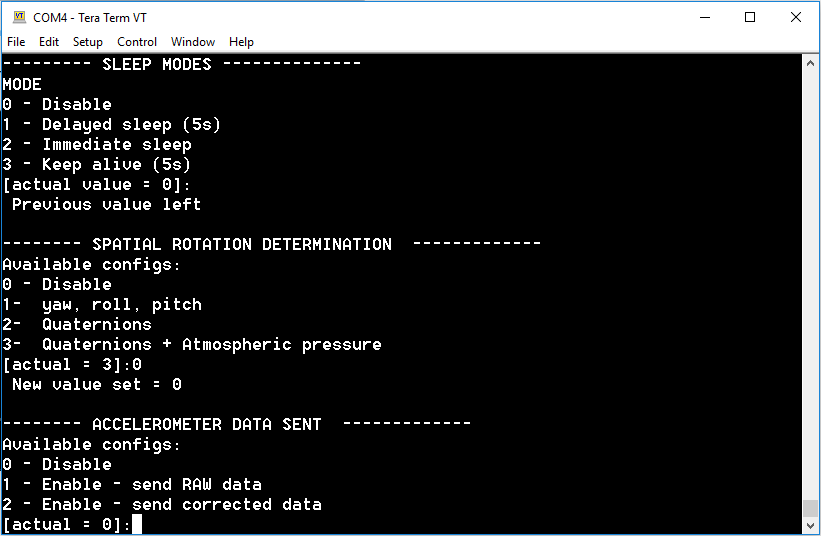
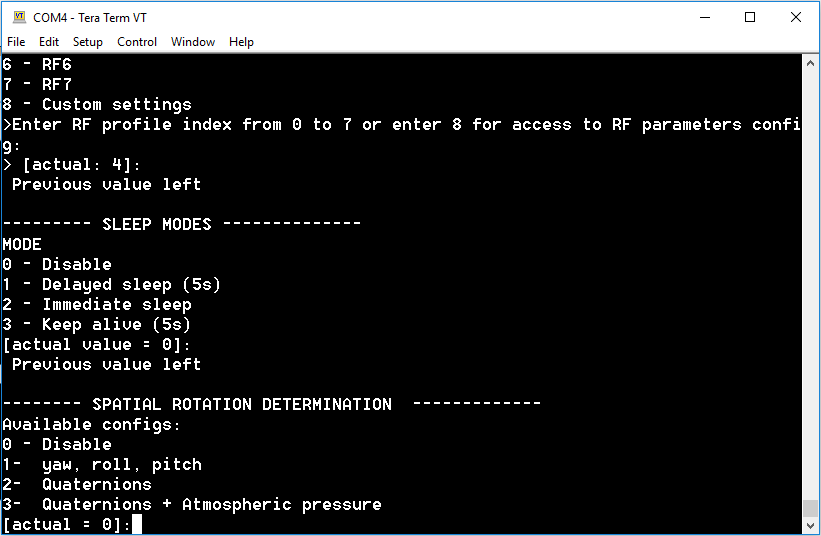
Sleep modes (Motion detection)
Immediate sleep is enabled by default, see section “Sleep modes” for more details. If you want to set other modes press the mode’s number and confirm it by pressing Enter.
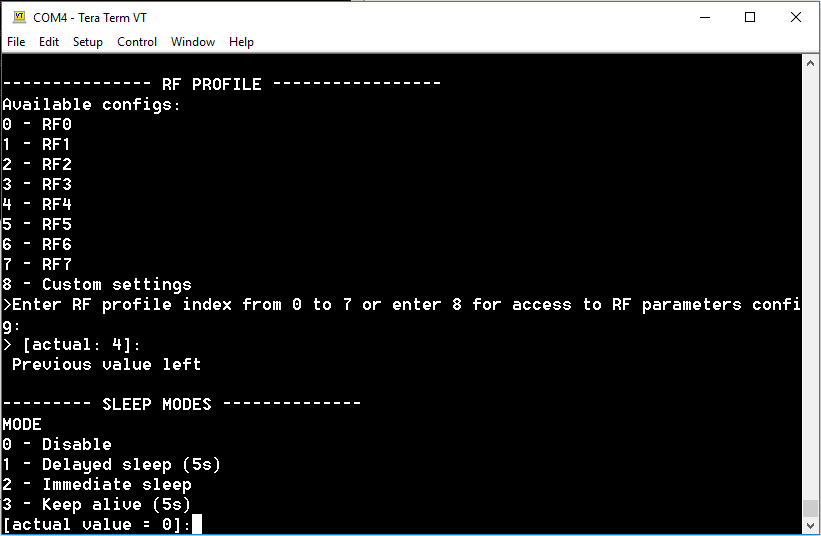
If you have chosen a mode other than disabling, you will be prompted to set the awakening threshold. Select one of the predefined values or enter 3 to enter your own value.
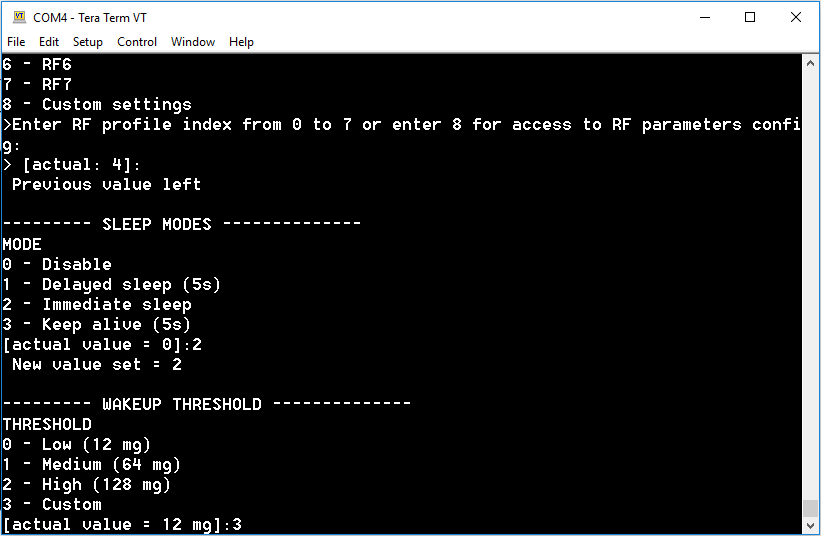
- If you have selected one of the predefined values, the setting of Motion detection is complete. If you entered 3, you will be prompted to enter a custom value. Enter the value in the defined range and press Enter.

Now the setting of this feature is complete, you can skip other settings by pressing ENTER.
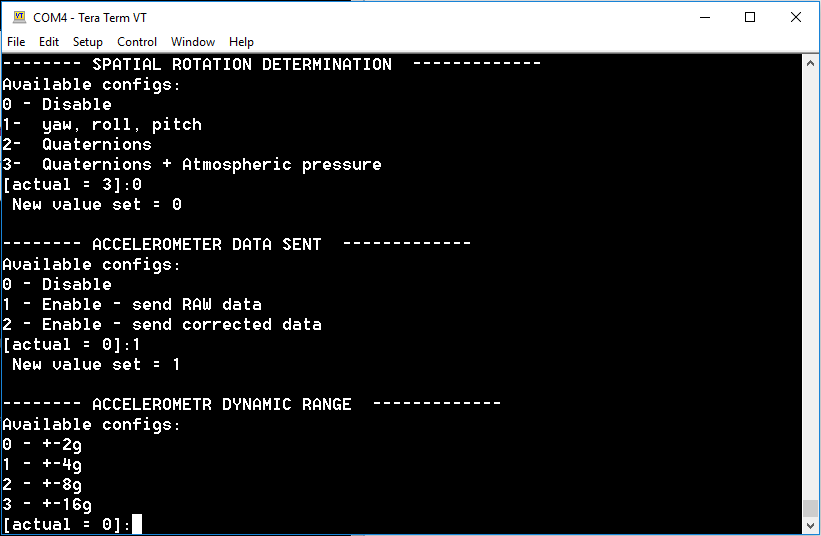
Accelerometer
- This function is disabled by default, see section “Accelerometer data” for more details. If you want to enable it, select “1” or “2” and confirm it by press Enter.
- You will be prompted to set the accelerometer’s dynamic range. Choose the optimum variant for your use case and confirm it by press Enter.
- Now the setting of this feature is complete, you can skip other settings by pressing Enter.
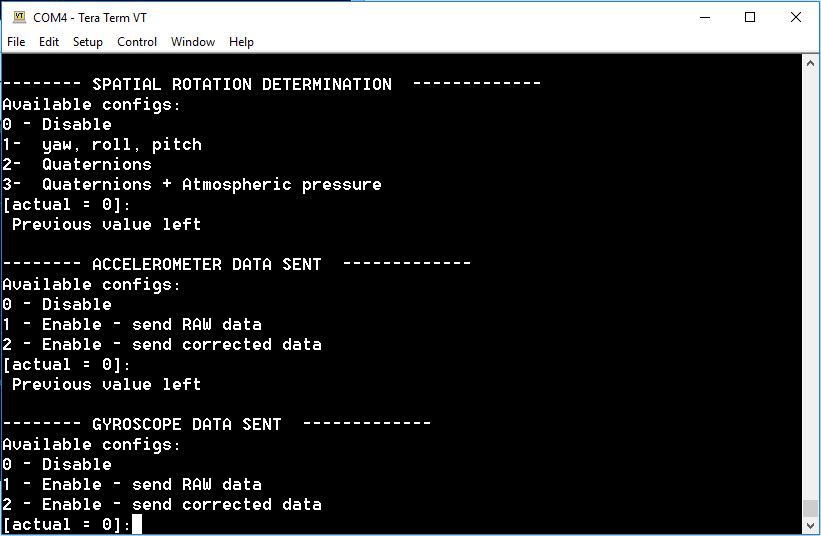
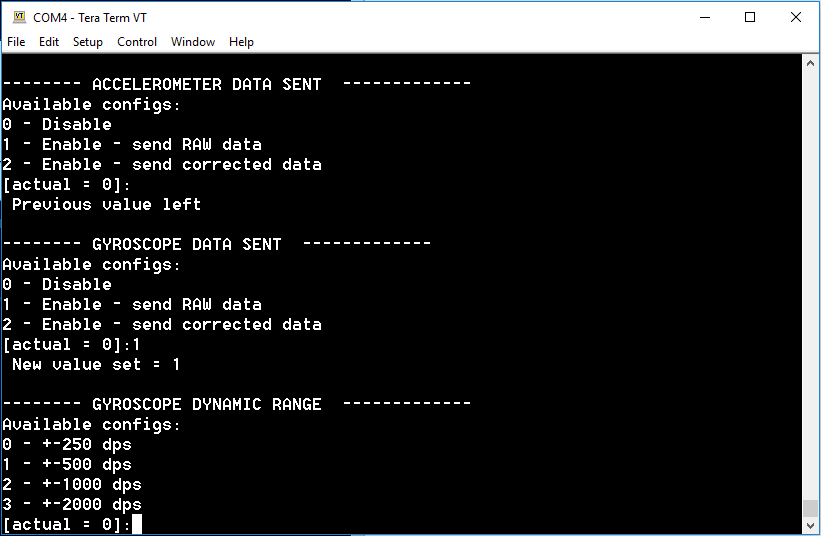
Gyroscope
- The function is disabled by default, see section “Gyroscope Data” for more info. If you want to enable it, put “1” or “2” and confirm it by press Enter.
- If you have enabled it, you will be prompted to set the gyroscope’s dynamic range. Choose the optimum variant for your use case and confirm it by press Enter.
- Now the setting of this feature is complete, you can skip other settings by pressing Enter.
Magnetometer
- This function is disabled by default. If you want to enable it, select “1” or “2” and confirm it by press Enter.
- Now the setting of this feature is complete, you can skip other settings by pressing Enter.
Barometer and thermometer data
- Data from the barometer and thermometer can be sent alone or together with data from other sensors, look for the “Barometer data”. The function is disabled by default. Choose an optimal precision for your use case and confirm it by pressing Enter.
If you would like to send that data together with quaternions, see the next section.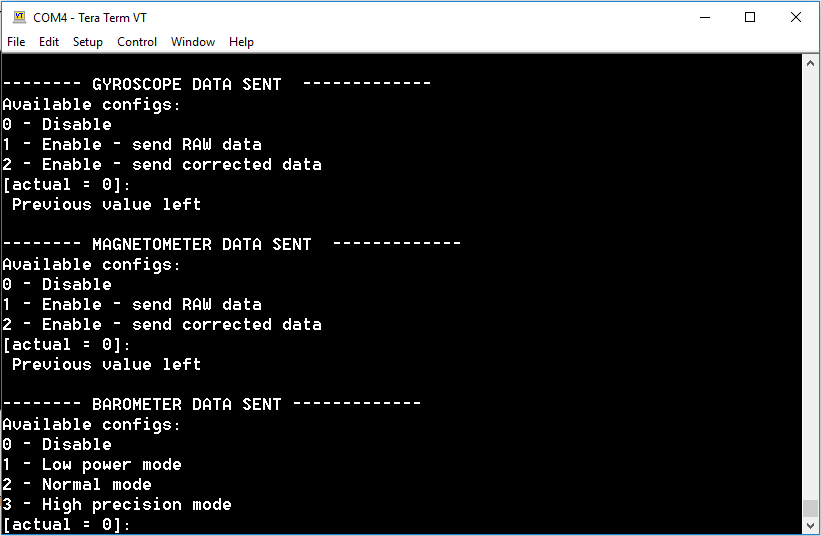
- Now the setting of this feature is complete, you can skip other settings by pressing Enter.
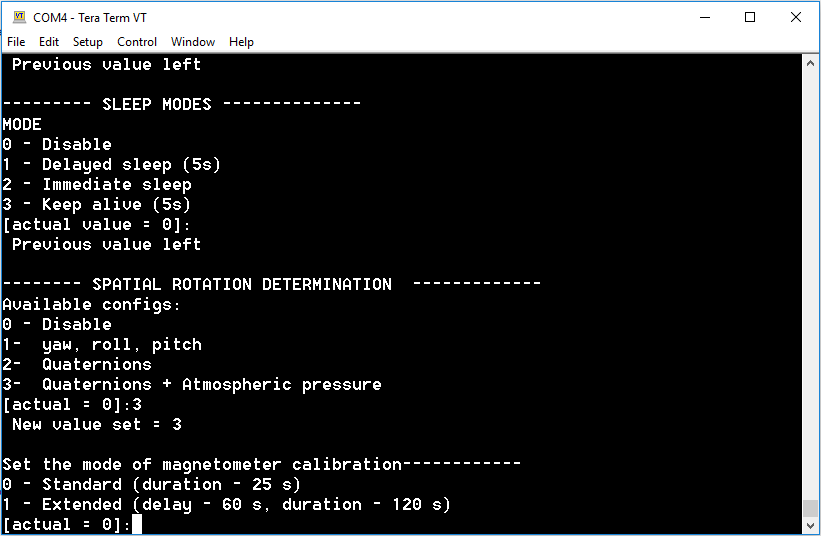
Spatial rotation determination
- Look for the Spatial orientation determination parameter. Choose optimal representation for your use case and confirm it by press Enter.
- Now the setting of this feature is complete, you can skip other settings by pressing Enter. Full-scale range of Inertial sensors and precision of barometer will be set automatically.
Magnetometer calibration
- If you activate Magnetometer data or Spatial rotation determination, you will be prompted to calibrate the Tag. Press “0” for standard calibration or "1" for extended calibration (you will have one minute to close it to the customized enclosure and then two minutes for calibration) and confirm it by pressing Enter.
- After selection of calibration mode, it will prompt you to confirm calibration to start the calibration process.
- You will need to rotate the Tag manually across all three axes to calibrate the magnetometer for 25 seconds or up to two minutes if you selected extended calibration. After this is finished, the calibration process is also done. You can skip the next parameter changes by keeping pressing Enter.
Inertial measurement unit calibration
- If you activate Gyroscope, Accelerometer, or Spatial rotation data, you will be prompted to calibrate the Tag, press “1” and confirm with entering.
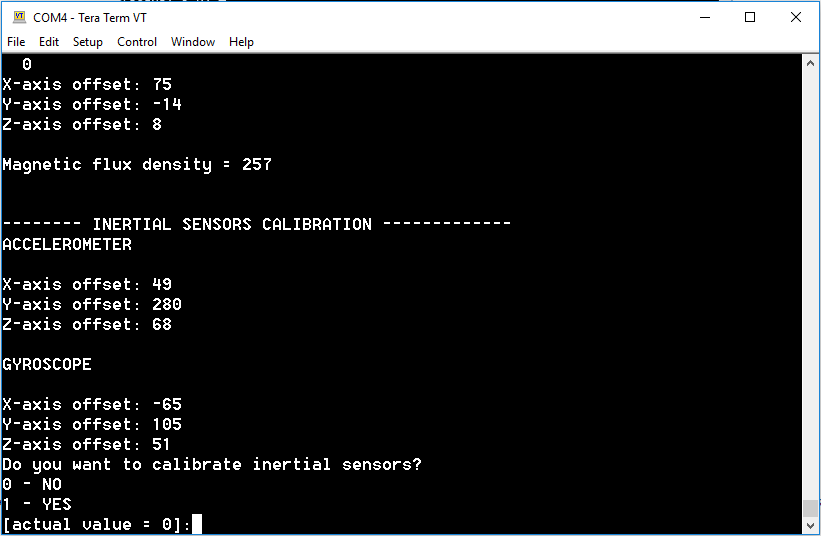
- You will need to place the tag on flat surface. Do it and press Enter again. This calibration takes about 2 seconds. You can skip the next parameter changes by keeping pressing Enter.